I actually started these last Sunday after my croissant and brioche class (hi everyone who came from that!), the day of the New York Pride parade. But I didn't actually have time to finish them until this Saturday, the very last day of Pride Month -- skating in just under the wire to support the LGBTQIA+ community, and finally get an idea out of my head and into the world.
UPDATED with more pictures -- scroll down!
You've probably seen this London hotel's rainbow croissants, but I've never seen a recipe or technique that goes with it. And I wanted to make the colors run parallel to the croissant's sections, rather than perpendicular, so each one would be more likely to display all the colors side by side.
I started with a batch of croissant dough, made the usual way with 3 single folds.
While that rested, I made a small batch (approximately 300 g of flour) of "dead dough" -- the detrempe without the yeast. I used all milk for extensibility, and all-purpose flour because I knew I'd be handling it a lot just to mix the colors in. I divided this dough into three pieces and colored one with egg yellow, one with sky blue, and one with rose pink/red red. (Gel colors rather then liquid, so the dough didn't get too soft.) I then took about a third from each and mixed them with each other to create green, orange and purple/violet doughs. Wrapped and chilled to relax the considerable gluten developed.
Cut to Saturday! Little 2 helped me -- actually she bugged me to make them even though I said it was too hot. I'm glad she did though, I would not have persevered if not for her!
I figured out that my best bet for making the color strips very even was using a pasta machine. So each color was run through with a bit of flour to make a piece with consistent thickness.
I handcut strips and stacked them, slightly overlapping, to make the rainbow. (You'll see I tried a few different sequences of colors)
Going through the pasta roller a few times to make the whole piece thinner. I stopped on setting 4.
These went into the fridge.
Rolled out half of the plain dough, dabbed it with water to make the color panels stick.
Rolled over a few times to make sure they adhered well, then chilled a good while. I had to cut this piece in half to fit it in the fridge...
Rolled out again, to about 10 inches wide, then cut in triangles. Notice the different sequences...
rolled into the familiar croissant shape, and set onto silpat-lined pans to proof.
I use a half sheet plastic cover to prevent them from drying out but also so nothing sticks to the soft dough and chances ripping the surface.
I decided not to eggwash them so they retained more of their color instead of being yellow-tinged, but of course if it matters to you to be authentic you can eggwash them.. or brush them with glaze after baking.
Et voila -- Croissants arc en ciel! Happy Pride everyone... We are chuffed that these worked as well as they did. Next time I will try to make the orange truer in tone, make the color dough sheets thinner if I can, and pick a cooler/less humid day to do them!
UPDATE: We made them again !
This time I didn't use a pasta machine and just laid the colors out in wide panels striped parallel to the long sides of the rectangle -- i got a few that were each color, and a few i cut perpendicular to get as many colors on there as I could. It was much easier but each croissant was not as rainbow-y. I also used a much truer-toned blue color so it came out brighter in the baked finish. I think the happy medium is between the two tho!
UPDATED with videos and freezing tip! Sorry it took awhile.
I tried to come up with a catchy title, but not that hard .. because the fluffy, buttery delight that is ensaymada lends itself to pictures rather than descriptives.
The sweet, pillowy ensaymada of the Philippines is rather far removed from its Spanish ancestor, which is more like a Latin pan de queso -- as like adobo, where we kept the name but completely co-opted the elements :D.
I come at this from the POV of someone who has a good relationship with yeast's two sides -- the primadonna with exacting parameters, and the loosey- goosey flowerchild that does what it wants, when it wants. Given that, ensaymada falls into the family of bready yeast-risen pastries that includes brioche, challah, pannetone, malasadas, and other sugar-, butter-, and/or egg-enriched tender doughs.
Making the dough is relatively straightforward with a standing mixer, a little less so by hand... developing the gluten takes a good while with all that richness! I favor making a sponge, beefed up with a little sourdough mother for extensibility and ease of shaping.
Ensaymada
Make the sponge: 1 tbsp./ 16 g active dry yeast 4 oz/ 112 g water, room temperature
1 tbsp/ 15 g sugar
12 oz/ 354 g evaporated milk or half-and- half, room temperature
6.3 oz/180 g liquid starter
14 oz/ 400 g unbleached all purpose flour
Whisk the yeast into the water in a mixer bowl. Add the rest of the ingredients and whisk to form a thin batter. Cover and let rise 30 minutes; it will look (surprise!) like a sea sponge, bubbly/foamy with a bit of shine. Complete the dough:
16-18 oz/ 450-500 g unbleached all-purpose flour
4 oz/ 113 g unsalted butter, softened but cool
4 egg yolks
2 eggs
5.3 oz/150 g sugar
1 tbsp/15 g salt
Add the remaining ingredients and combine with the hook attachment on medium-low speed. It will look like a mess for a little bit, but will come together eventually! Scrape down the bowl with a rubber spatula to get the flour and eggs to absorb completely, and to ensure that the butter doesn't just gather around the hook. Knead on medium speed until it is smooth and uniform, and does the climbing-up-the-hook you see here.
This should take a good 5-7 minutes after there are no more streaks of egg or flour. Test it by taking a little of the dough and stretching it open between your fingers -- you need to be able to get a 1-inch window that you can see light through but doesn't tear.
Cover and let rise in the bowl until doubled; it should take about 45 minutes at room temperature, but the butter will leak out if you make it warmer. Patience -- remember, loosey-goosey flowerchild has its own timeline. If you want, let the dough rise in the fridge overnight. (I tend not to do this since it makes it harder to shape consistently, but if you want, shape only half and save the other half in the freezer for another time.)
To test whether the dough has doubled in size, poke it with a floured fingertip or two, about an inch deep. If the depressions fill in quickly, try again in 10 minutes; if they fill in slowly or not at all, you can deflate and divide.
Push down and pull the outsides of the dough to the middle; this evens out both the yeast activity and the temperature. Turn the dough out onto a lightly floured counter and use a knife or scraper to divide it into even pieces -- I divided into quarters, then each quarter into 6, so each ensaymada starts with about 3 oz/ 85 g.
Tuck the corners of each piece under so they are more-or-less rounded and line them up as you do them; keeping track of the order in which you tucked helps give the gluten time to rest for shaping. Cover the pieces (with a kitchen towel, upside-down pan, or plastic wrap) to prevent them from drying out as you shape the others. Shape and fill:
approx. 3 oz/ 85 g unsalted butter, softened to spreadable
about 3 oz/ 85 g grated cheese -- I use sharp white and yellow cheddar, but you can use Gouda, Edam, or Emmenthal or a combination.
approx 5 oz/ 140 g sugar
(optional fillings: chopped ham, ube spread, crumbled chorizo, salted egg, macapuno or coco jam, etc)
Buttered pans of your choice: I use deeply fluted flared-out aluminum molds that hold about 5 oz/ 140 g., but 4 oz muffin pans, deep tart pans, custard cups or silicone molds work as well.
The shaping is where it gets easier with pictures. With a small rolling pin or smooth glass, roll each dough piece into an oval about 3 in/8 cm wide by 10 in/25 cm long. Spread with butter, then layer on cheese and sugar (and any other toppings; you might find that less sugar is better with wet fillings.)
Start to twist and roll by flipping the bottom left over, then push to make the oval wrap around itself on an angle so you get all the fillings on the inside.
you want to end up with a rope that is fairly even in diameter. Hold on to the end in your left hand and use your right hand to coil the rope around that.
Place in the prepared pans, tucking the outside end underneath enough so it doesn't stick out, but not enough so it makes the coil tilt.
As you shape them, place the pans under another towel, pan or plastic wrap so they don't dry out. Repeat! Let them rise until they feel puffy and light; note that if you use a filling that is very salty, they will rise more slowly. It will take a good 30-40 minutes.
Heat the oven to 350F/ 175C. When the ensaymada have risen, quickly spritz the oven with some water -- I just use a squeeze bottle, but if you have a spray bottle, aim for the walls and not the floor. While the oven is still steamy, load in the ensaymada and close the door.
They will rise quickly in the first 15 minutes (this is called oven spring -- something unique to yeasted doughs that is pure satisfaction after you've tried so hard to coddle the diva! ;D), then start to brown because of all the butter, egg and sugar. If they are getting too dark for your liking, cover them with foil so they will continue to cook on the bottom but not the top. Depending on size, this will take 15-25 minutes.
Let the ensaymada cool in the pans until they are just warm, then carefully loosen with your fingertips and a butter knife or small spatula -- the bits of cheese and cooked sugar will make them stick a bit, so don't wait until they are completely cool, but if they are too hot the ensaymada will deflate as you try to get them out of the pans. Let them cool on a rack while you make the topping.
Traditionally, a slather of butter, sugar and cheese is the finish for these; in the last 30 or so years though, most ensaymada you see have used some form of buttercream. It makes sense to combine the butter and sugar into an emulsified, stays-where-you-put-it frosting, and it adds an element of smooth lightness. I use a Swiss meringue buttercream, because it fluffs up nicely and isn't too sweet.
2 egg whites
4.25 oz/120 g sugar
pinch salt
6 oz/180 g unsalted butter, in small cubes
Bring a small saucepan of water to a simmer. Have the eggwhites, sugar and salt in a mixer bowl, and set it in the simmering water.
Heat the mixture, whisking all the while, until the sugar dissolves and the mixture is hot.
Take it off the water and whip on the mixer on high speed until the meringue is cooled off, tripled in volume and very white.
When you touch it, it should feel room temperature at the most. Add the butter and beat in until completely incorporated and very fluffy.
Spread the buttercream on the completely cooled ensaymada, then add more sugar and cheese.
I like to mix a bit of the cheese in the buttercream, then finish with a light sprinkling, rather than the thick cheese helmet that often garnishes the ones in packages. If you have other fillings, it's helpful to garnish with some of those too -- like a dot or stripe of ube or coco jam, or some bits of chorizo, so people know what they're getting.
Then eat away!
Really these are best the day of baking, but they can also be frozen the day of baking, then defrosted without much loss of quality... If you can plan ahead, freeze the ensaymada without topping. Defrost, then refresh them for about 10 minutes in a 300F/150C oven, cool then add the buttercream and garnish. Some people like them cold, but I just can't -- you miss out on so much of the flavor of the actual bread part.
Meet Sans from Undertale and DC's Catwoman. Yes, those are a hoodie, shirt and leggings made from cotton interlock. Yes, i did think about their costumes ahead of time, and so did they.
A catsuit? Totally makeable but not not very comfortable to spend a whole day at school in.
Big hard helmet-type mask? Again, makeable but not practical either. So instead, regular, can-wear-them-all-the-time clothes with just a bit of detail, and some iconic accessories.
A zip-up hoodie with pockets and fuzzy edging (it's the same stuff from Abomasnow two Halloweens ago), is by far the most recognizable thing about Sans' getup. I realize now that it could be longer -- must get longer zipper and replace it for another two or three years' wear!
The hat/mask is a tube of white cotton knit, closed at the top. I had him put it on to mark the placement of eyes and nose. Very thin nylon/cotton knit patches were basted in place, then i cut out the holes with tiny snips before hand-stitching around the edges -- voila, a comfortable, lightweight mask that he can breathe and see out of (in good light!) That's him putting on the rest of the details (Sans' smile especially) with a permanent marker.
She gets a mock-neck t-shirt with some cats'-eye gems, and some leggings, in French terry. Cat ears, made from paper hot-glued to a headband, are all she needs. She decided she needed a glittery lariat.
These are the stuff of cozy daydreams and tearful Tumblr posts. Contrary to what those say, they are not too good for this world. In fact, it may be through making and consuming these that the world becomes a place good enough for them... :D If you want these for breakfast, you'll need to start a day ahead; they rise well enough at room temperature but the dough is messy to shape if it's not cold. 1 ½ tsp dry yeast (7.5 g)
2 oz water (57 g)
1# ¾ oz all purpose flour (475 g) 1 tsp salt (5 g) 2 oz sugar (57 g)
Shaping: 4 oz butter (113 g), 8 oz sugar (227 g) mixed with 2 tbsp cinnamon (15 g) and a pinch of salt and nutmeg
Icing: 4 oz (113 g) confectioner's sugar, 1 oz cream, 1/4 tsp. vanilla, pinch salt
Have everything at cool room temperature; it makes for a more easily blended dough and a happier yeast environment if the dough is not too warm.
In a measuring cup or medium bowl, sprinkle the yeast onto the water and let it sit.
Combine the dry ingredients in a mixer bowl and add the butter; mix with the hook until it makes coarse crumbs.
Add everything else to the yeast water and whisk together. Pour this mixture into the bowl of crumbs with the mixer going.
Mix on low speed until the dough pulls away from the sides (and makes a satisfying fwap-fwap sound as it gathers around the hook and hits against the bowl). Butter or cooking-spray a large piece of plastic wrap. Turn the dough out onto it, trying to get it into a more-or-less-even thickness. Use the greased wrap to enclose the dough in a rectangle, then open it up and re-wrap loosely.
Let rise in the fridge overnight. (As the dough gets cold enough, it will stop rising. It will take about 3 hours if you're counting, or doing this during the day.)
Without letting the dough fold over, turn it out of the plastic wrap onto a floured surface. Press and roll it out into a rectangle about 12x18 inches.
Spread softened or melted and cooled butter all over (all the way to the edges, except leave an inch bare on one long edge) then heavily dredge with cinnamon sugar. (If you like, you can just mix everything together in a bowl and spread it on like that.)
Roll up tightly toward that bare edge -- it will seal together better. Pinch up. Mark the roll into 4, then each quarter in 3. Cut where you've marked -- my favorite way is with dental floss. (For smaller ones that fit in a cupcake pan, cut in 18.)
Space them out, cut side up, in a buttered 9x12 pan, 3x4 rows. (you can also do 6 in a 8x8 pan, and freeze the other half of the rolls for another time.)
Cover with a towel or plastic wrap, and let rise until they look puffy and doubled in size.Bake at 350 until they look yummy and browned where they meet. Let cool slightly so they firm up a bit.. Smear with icing; it will fill in the spaces as it melts. NOmmmms.
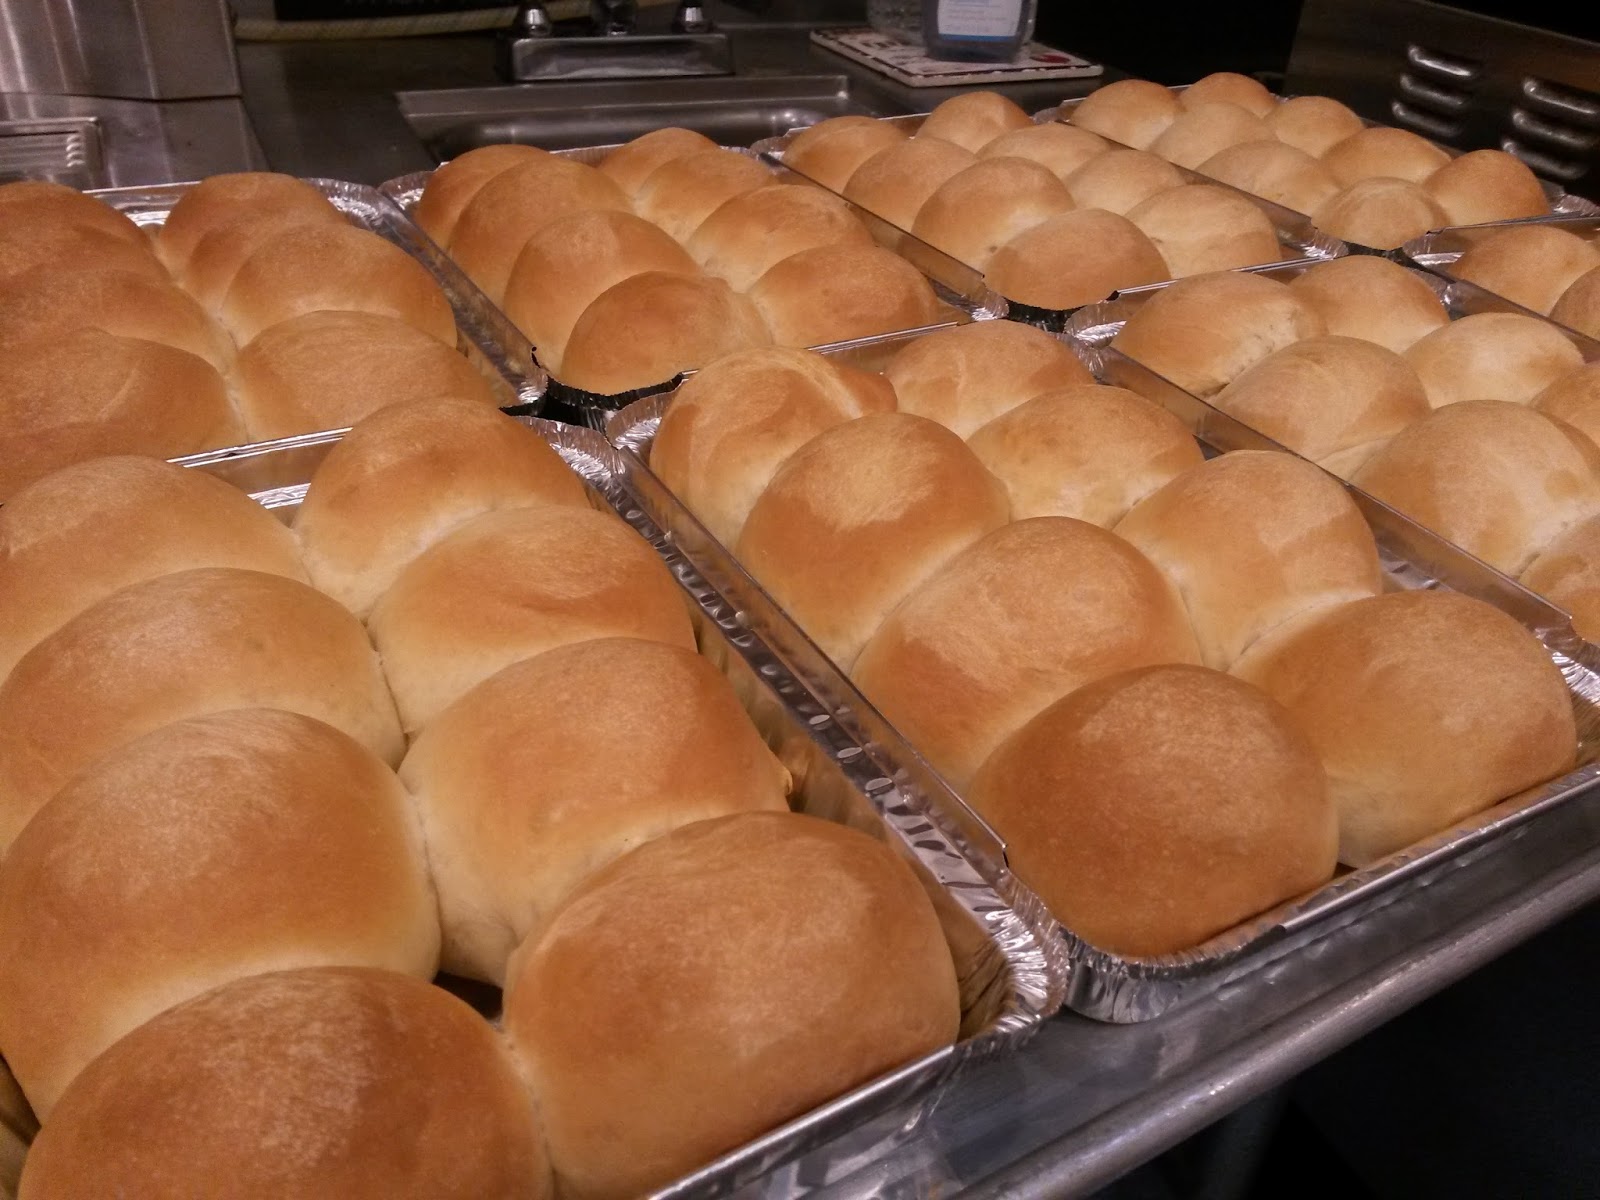
There are few things nicer than a good dinner roll, but too often they are plain and flabby, no flavor just fluff. These have a bit of heft, and a toasty undertone from the brown sugar and eggs. The original makes 100, so this is just a tad more manageable quantity. They make a great slider bun as well.
Albert Kumin's Dinner Rolls makes 24 at 35 g, or (slightly bigger) 20 at 42 g.
227 g milk
7 g yeast + 5 g water
45 g. lt brown sugar
45 g butter
45 g eggs
45 g starter
454 g bread flour
8.5 g salt
Either warm the milk and sand the butter into the combined dry ingredients or melt and cool the milk and butter together -- if you have more time, do the former for a cool dough that rises slowly with more flavor. Warmer dough means a faster rise.
Ferment; divide into 4 presses and round, then each into 5 or 6 and round tightly. Set 4x6 in a buttered 13x9 pan. (In the pix, there are 8 in a foil 4x7 pan...) Proof, brush with milk and bake without steam for about 20 minutes.
Quite proud of this year's efforts... P just wanted a long black cloak with a hood -- Grim Reaper, Palpatine/other random Sith, or Voldemort. Easily achieved -- harking back to his original Jedi robes from long ago, it's a long selvage-to-selvage rectangle with slashes on the sides for sleeves, which were half the width of the body. I sloped both shoulder and cuff lines slightly. The hood is nice and deep and it has a snap at the throat so he can wear it as a cape too. It's exactly what he wanted, with lots of growing room.
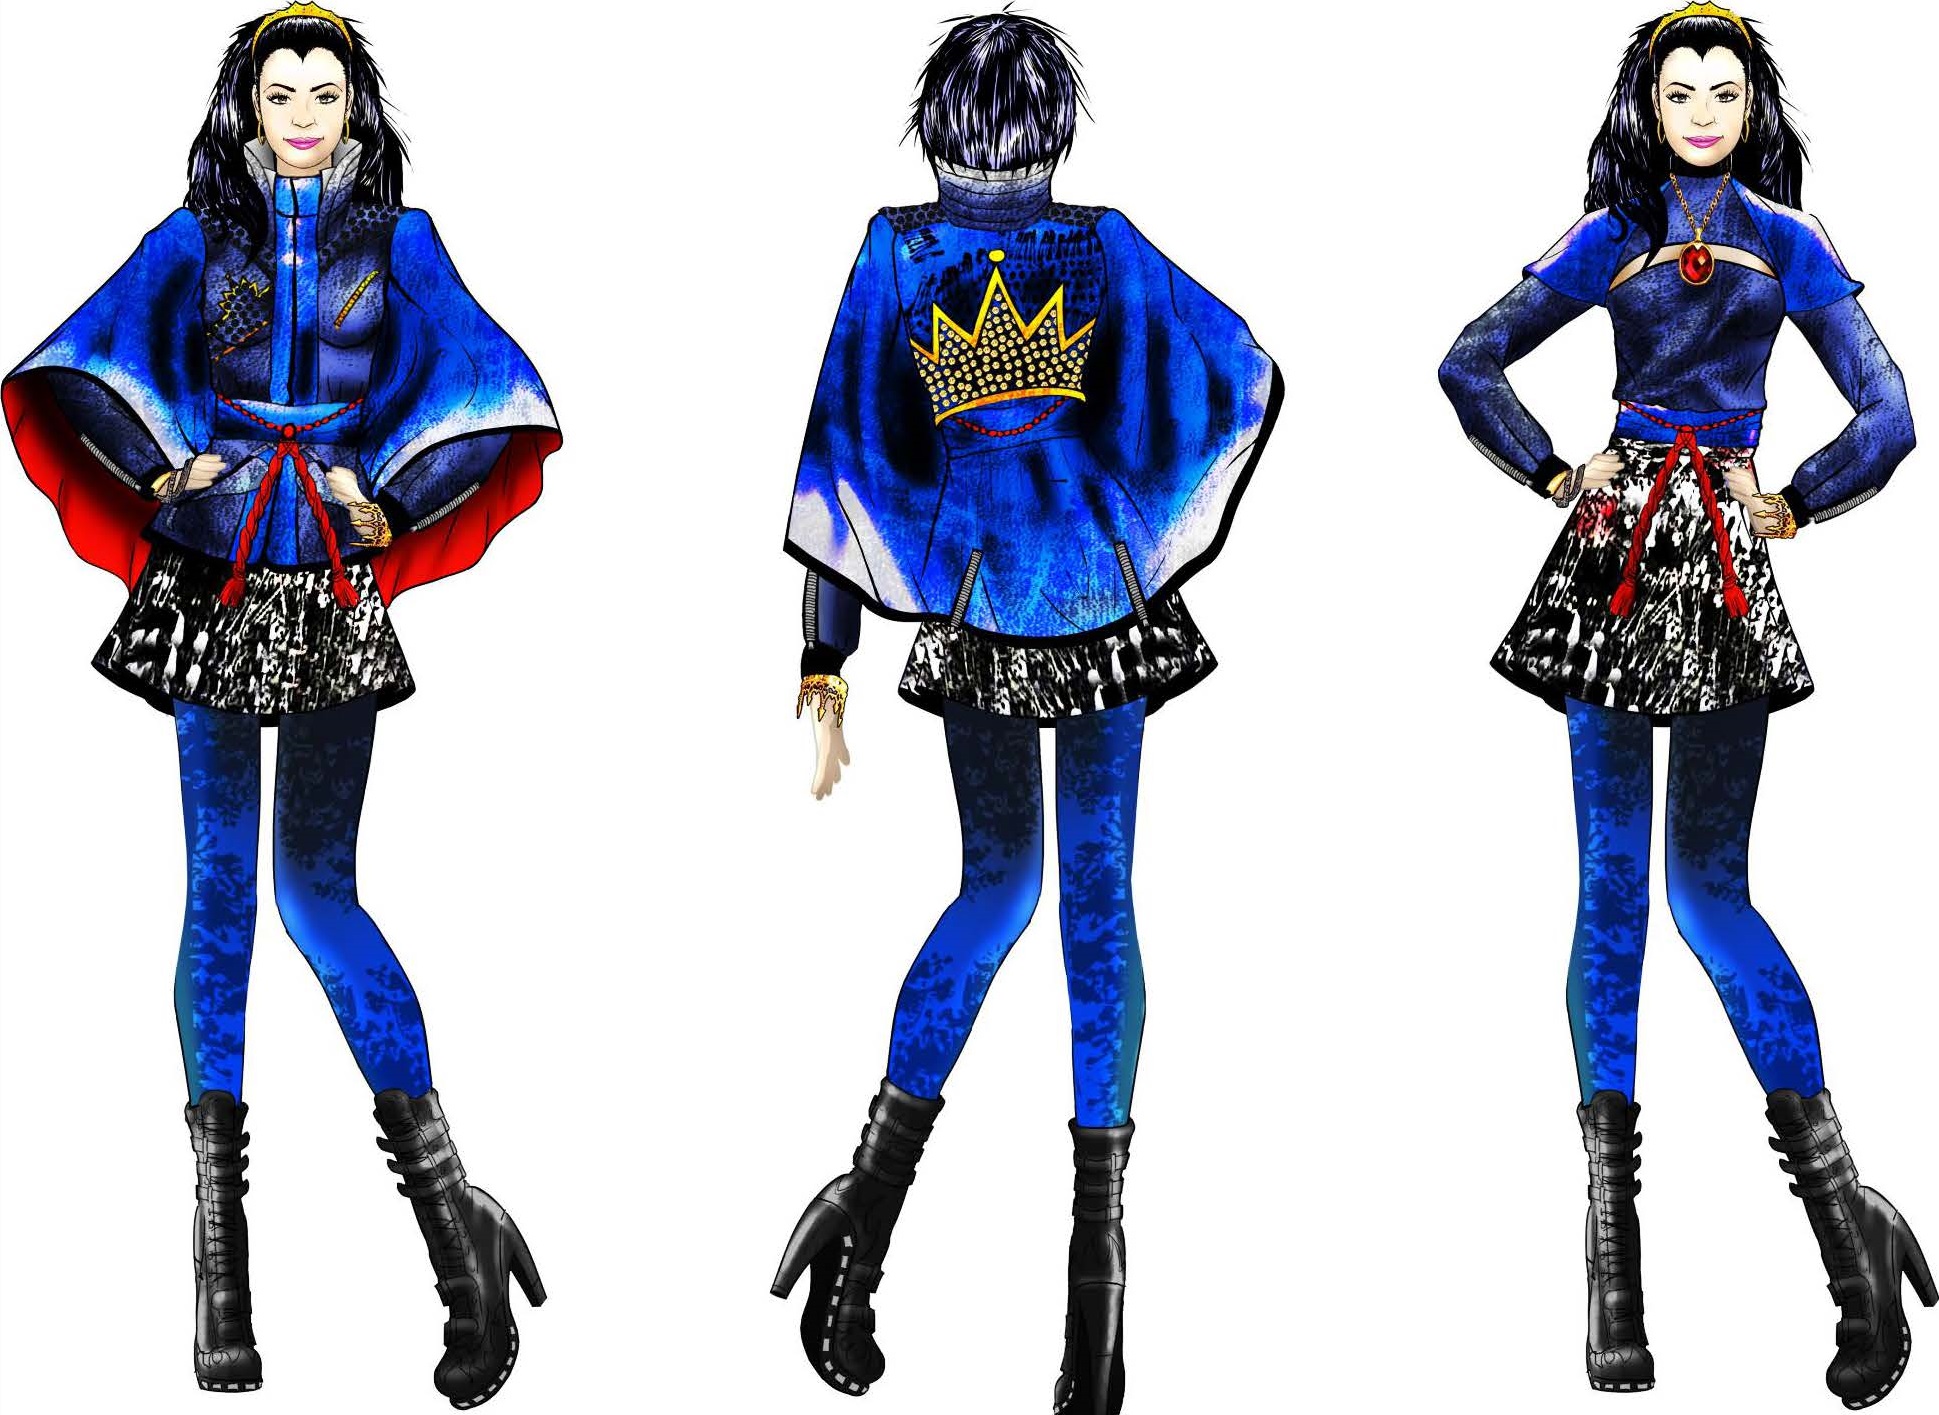
With less than two weeks to go, K changed her mind from Scarlet Overkill (i was excited for that rocket dress!)
to Evie, daughter of Snow White's Evil Queen stepmother, from the Descendants TV movie...
looking at these sketches I thought it was more like a cape, but looking at how it moves in the movie (and probably taking into consideration changes made during production), it's really more like a moto jacket with bell sleeves. So mine is a tribute to, or inspired by, Ms. Saun's distressed leather multi-layered creation.
I went with costume satin -- a dark royal blue rather than the navy/denim shade of the leather, and remnants of red for the lining. I used a basic raglan draft and a combination of slash-and-spread and plain swinging-out lines to get the right shape for the sleeves. (I wanted a fluid look, not the boxiness I sometimes get with set-in sleeves... )
I constructed the lined sleeves first, then sewed them to the body... I dithered about lining the whole thing, but I'm glad I did because it made it that much warmer, and prevented the back applique from irritating or snagging. Rather than the sculpted/princess seams of the leather source garment, I sewed the front and back as straight pieces then pin-fit deep bodice darts.
Franny helped with the hand-painting of the sleeves and wide stand-up collar -- we used Speedball waterbased screenprinting paint and regular flat and stiff round brushes. This is heat-set and washable!
I'm rather proud of the way the 24" brass zipper looks -- I used it as a non-functional edging for the open collar instead of trimming at the top. F has historical difficulty with jacket zippers, so i made sure this one stuck out from the bottom enough. Added a few brass studs to the front -- it's tiring doing those one-by-one, so I stopped at 6 per side...
jacket front: metal studs, 24" brass jacket zipper used as both closure and "piping"/finishing for the neckline.
The other components: a dark blue mock turtleneck with finger-loop sleeves (that I made into a
leotard just because!), tights hand-painted to look wrecked, and a circle skirt with an elastic waist. I couldn't find any red/blue/black/white print, so I color-blocked a dark blue batik and a Robert Kaufman vortex/starry sky print. I then had some fun embroidering touches of red...
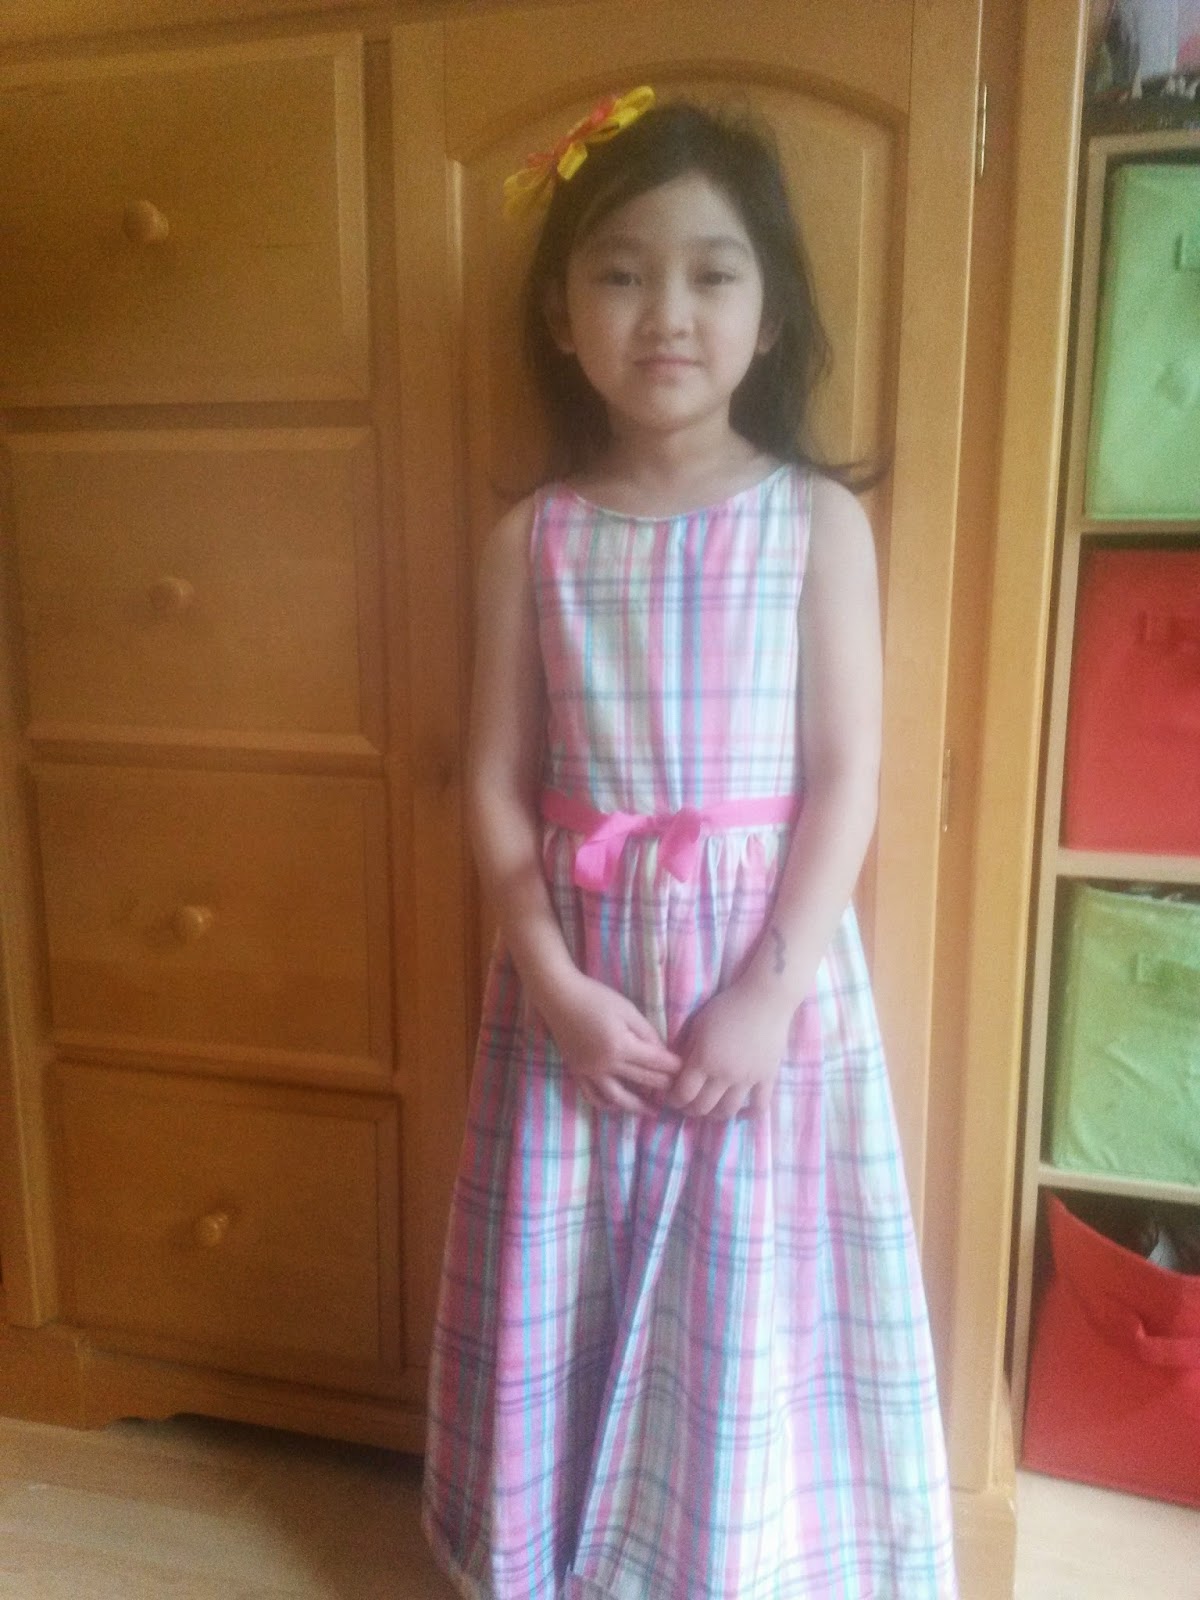
... that was the actual caption on her drawing of her Easter dress.
She picked out this spring like plaid from my stash and drew what she wanted. Short and full lost out to longer and less so.
The o+S Fairytale dress has been my default for fitted bodices for her -- the armscye brought in a bit and the neckline made into a sabrina/ shallow boatneck for this one. Deep pink herringbone twill tape instead if a self-bow.
though I sewed all night and finished it in time, Easter dawned with gloomy skies and enough chill in the air to need layers inside and out, so no good dress pictures that day.
We waited for a bit of sun, bit still kind of cold to go sleeveless outside -- so these are by a sunny window (shy about smiling because she's missing a tooth on the bottom :D)