Showing posts with label dairy-free. Show all posts

Thursday, August 14, 2025

Achievement unlocked -- Sourdough Hongkong-style charsiu (and other fillings) bao


Classic charsiu bao


As a maker/baker, i will readily admit that frozen bao and dimsum are staples of our family's Asian market grocery cart for easily-prepared, fuss-free eating for all four in our household. 
Recently though, I decided to deep-dive into making our own freezer stash of Hongkong-style steamed bao -- slightly sweet dough, that signature popped-open top, a size that went easily into heavy snack/small meal. I knew the regular yeasted doughs would produce a good siopao with a smooth surface, but i fixated on that flower-like peekaboo, a cushiony, not-too-bready texture, and of course a well-flavored filling of charsiu pork. Using my sourdough starter, of course.

peekaboo filling is peeking a little too much!

The rabbit hole of what makes the ideal bao bun led me to Souped-up Recipe's Mandy Fu. Some of the ingredients she calls for are specialized, and definitely lean toward the alkaline -- lye water and ammonium carbonate, as well as baking powder. Why? Because the acidity of the fermented starter combines with these to produce a light, cottony texture that has no rise time and should be shaped and steamed immediately. I did this, hunting down baker's ammonia, and the yellow-labelled lye water that weren't available at my regular Asian market -- when I asked the owners, they said nobody used it anymore except big bakeries. 

If bao are the only thing you ever make with a pre-ferment, by all means use Ms. Fu's yeast-based 3-day starter -- it is a build that gives you the exact amount you need for a batch. On the other hand, if you have a starter that is alive and well, a few feeds will get it to the point where it is perfect for this use. 

Most steamed bao doughs use cake flour -- it gives a biscuity, less chewy quality to the end result, and is responsible for the steaming opening up the top because the dough is shaped but not too glutenous.  I wanted something that had some chew, as well as enough structure to hold in the saucy filling. 

It's still a work in progress, but this is by far the closest I have gotten to my own personal charsiu bao goal. It makes 24, because this is to stock the freezer!

Chicken meatball bao
Sourdough build: 
200 g mature sourdough starter
60 g all-purpose flour (bleached ok)
40 g fine rice flour
60 g water
Repeat the same 60% feed every 8-12 hours twice more without discarding any, so that you have approximately 680 g. pre-ferment. This will feel in between a stiff starter and a liquid one, because of the extra starch and 60% hydration. Let rise after the last feed until it doubles, about 6 hours to up to overnight.

Have 24 3x3 paper squares or standard cupcake liners ready, and water for steamer baskets heating.
640 g starter
266 g sugar
40 g shortening or lard
16 drops lye water
Mix until smooth, either with the dough hook or by hand.
1 tsp baker's ammonia
300 g all-purpose flour
60 g fine rice flour (360 g cake flour if you prefer, see above)
2 tbsp baking powder
Knead smooth, then divide into 50 g pieces. Keep covered. Dust the surface with rice flour and roll a piece into a circle. Thin out the edges with a rolling pin, so that the circle is about 4 1/2" wide (12 cm).  
Center 30 g filling* and pinch the top closed into quarters. Try to keep the filling centered and the top not too thick. Place on the prepared paper. 
Repeat to fill a steamer (but don't crowd them -- leave room for the buns to fluff), then place above the rolling-boil water.  If your steamer is bamboo, enough water vapor will escape that your buns will have the needed moisture; but if your steamer cover is metal or glass, secure a kitchen towel around it to absorb extra water so it doesn't drip back down onto the buns and cause spots or sogginess. Steam for 16-18 minutes, tightly covered. 
Remove from the water, but allow to cool for 10 minutes before uncovering so the buns don't collapse. Do the same for all the pieces, setting them onto a rack to cool out of the baskets.
Once the buns are all cooked and cooled, place them in a single layer in a gallon freezer bag and freeze flat. When they are frozen solid, you can stack the bao to conserve space and minimize air in the bag. 

*filling possibilities: charsiu pork or chicken in a gingery, oyster/hoisin cornstarch-thickened sauce (pork/chicken asado); ground turkey or chicken or shrimp meatball with Chinese chives, lap cheong or yun chang sausage and hard-boiled eggs, either quartered or quail ("bola bola"); cornstarch-thickened custard.


Friday, May 31, 2019

pretty-colored potato rolls -- again.

We're almost at summer! So summer-colored bread buns. Also, potato hotdog buns (which, to be fair, are also great made into lobster rolls -- just split through the top rather than the side)... Partly inspired by the purple burger buns at Hapa, and my previous colored potato braid. Potato rolls are a classic for sandwiches because potato has a sort of timed-release moisture action in the baked bun, keeping it moist and soft but sturdy enough to stand up to loading with filling. These are not quite as smooth as Martin's, but they are tasty and a bit more complex in flavor because of the sourdough.  

The potatoes -- purple and Yukon gold, microwaved (most microwaves have a potato setting! If yours doesn't, one large or two smaller potatoes will take about 3 1/2 to 4 minutes on high), cooled, peeled and mashed. These are purple regular potatoes, not Okinawan sweet potatoes or Filipino ube. They're really deep purple!


Sourdough Potato Hotdog Buns (two-color version) makes 16 hotdog buns or 10 120 g burger buns
sponge: 
100 g. bread flour
90 g. water
20 g honey
8 g active dry or instant yeast
Beat together in the mixer bowl and let rise 1-4 hours, until puffed and bubbly. (if you're using instant yeast, you may want to add half now and the other half with the starter.)

Add and mix in with the hook:
320 g starter, fed 6-10 hours before
180 g bread flour
8 g salt 
20 g dry milk powder (optional)
(let rest 15-20 minutes to autolyse, if you wish. It's not essential, but it makes a smoother, more consistent dough.) Mix the dough again and divide it in half. 

175 g each mashed purple and Yukon gold potatoes (or 350 g of one kind)
30 g butter (or margarine, or coconut oil)

(Of course if you just want one color you'll skip the dividing and just mix the potatoes in with the whole batch.)
Add the potato to each half and mix it in with the butter (15 g or 1 tbsp for each part.) It might take a bit of kneading on the counter to get a uniform color, (I'm kind of disappointed the yellow is not that vibrant), round, then place in lightly buttered bowls and let rise until doubled, about 40 minutes to an hour.


Smileyfaces in the risen dough!

 Fold the edges in to de-gas, then turn each out.

Divide each into pieces about 38 g each, and fold to pre-shape. (The two in the middle will be single-color, so they're 75 g each.)


Roll into 6-inch ropes and twist. 

Lay them on a nonstick mat or parchment,
cover with a lid or plastic, and let rise... they may touch, but that's okay.
 

Bake at 350 about 20 minutes, until browned and sound hollow when tapped (the crust will be firm, but it softens as it cools). Pull them off the sheet and allow to cool on a rack so the bottoms don't get soggy.


The interior crumb.

Enjoy! 


Thursday, March 28, 2019

Sourdough starter -- starter pack! And pizza dough.

Crap I'm embarrassed. I've been saying that you can find a lot of info about sourdough starter on my blog, but there's no actual starter-sitting/maintenance info!! I swear I did a massive post several years ago, but suffice to say that I don't know where it went. Did I post it on another blog? Facebook or tumblr maybe? who knows.

So forthwith, a getting-there-without-tears sourdough starter post. The French call it a levain, and it's a batch of happy yeast cells in a liquid medium that is used by itself or in combo with commercial yeast to make doughs rise. 


There are many tutorials out there about how to begin a sourdough starter from scratch, such as Rose Levy Beranbaum's Bread Bible (she makes a stiff starter, double the flour to water, but the principle is the same) and the King Arthur Flour blog, and several videos as well. (I started mine about 20 years ago from organic rye flour, organic grapes and bottled water.)

If I've given you some of mine, or someone else has, then you just have to feed the starter and it will live on indefinitely. Every time you use it, just feed the remainder and the cells will remain active and the starter is ready to use whenever. If you don't plan on using it more than once a week, the starter can live in your fridge, where the cell activity will slow down from the cold enough so it stays alive, but not exhausting its food supply.


To feed the starter, weigh what you have and feed it half its weight in flour and half in water. For example, if the starter weighs 150 grams, you will stir in 75 g. flour and 75 g. water. You will then have 300 g. of starter, that will be most active if you give it about 6 hours at room temperature. It should rise to about double its size in about 4 hours. If you don't plan on using it soon, leave the fed starter at room temperature for an hour, then refrigerate it.


If you don't plan on using 300 g. and you want to keep less, you can discard some before you feed it, as long as you keep at least 60 g., to be fed 30 g each of flour and water. This amount fits in a pint container or 12-ounce jar with room to rise.


When you do want to use the refrigerated starter, leave it out at room temperature for an hour or two and watch for it to rise slightly. Then use however much your recipe calls for. Weigh the remainder and feed it as before, half water and half flour by weight. 


If you won't be using your starter for a bit, it will be okay in the freezer -- the longest I have frozen mine was two weeks. When you want to maintain it again, leave the frozen starter out at room temperature until it thaws out completely. Feed it as above and leave until you see bubbles and it has that fruity, slightly beer-y smell -- it may not rise to fully double, but it will be fine.

If you forget to feed your starter in the fridge for a week or two, and there is clear or greyish liquid on top, it is still okay. Stir that liquid back in, discard half of the starter, and feed it. Leave it at room temperature until it rises, then either use or refrigerate. If it takes a long time to rise (more than 6 hours with no activity), feed it again. Usually the most neglected starter will bounce back after two or three feedings 12 hours or so apart.

⇒⇒⇒If you ever see pinkish or orangey spots or liquid, or black mold, do not hesitate to throw the starter out. This is a sign of potentially harmful bacteria. Contact me to give you some more 😁, don't feel that you have to save it.

Here as an act of good starter faith is the pizza dough recipe I use: (even though at the moment my home oven is not conducive to pizza-making -- i will live through you all.)


Sourdough Pizza Dough
220 g. room-temp water
10 g. (2 tsp.) active dry yeast
165 g. all-purpose flour
300 g. bread flour
15 g. (1 tbsp) salt
15 g. (1 tbsp) sugar (optional -- it makes it brown better and rise a bit faster)
200 g. sourdough starter, fed about 6-10 hours before 
50 g. olive oil

Dissolve the yeast in the water. Mix together the dry ingredients. Form a well, and add the wet ingredients and yeast water. Combine with your fingers, sweeping the flour into the well to form a shaggy dough. Knead it until it is smooth and elastic, and you get a gluten window. (in the mixer, go 3 minutes on low, then 6-8 minutes on medium). Turn the dough out of the bowl and knead a few times just to bring any wet parts and dry parts together. Put a little olive oil in the bowl and drop the dough back in, turning it over to coat. Cover with plastic wrap.
Let the dough rise til it doubles (about 40 minutes) then knock it down and divide into pieces -- I usually make two 14" or three 10-12" from this size batch, or about 240 g. each for 4 individual pizzas depending on how thin you want to stretch it. 
Shape each piece into a ball, return them to the oiled bowl, cover, then rest in the fridge til you're ready to stretch. (Or freeze on an oiled pan until solid, then place in a freezer bag.)
I prep all my toppings first, then stretch and top and right into the 475 oven. If you want it puffier/more foccacia-like, let the pizza rise about 10-15 minutes with the toppings on.   

Rise, and shine! 

Monday, February 4, 2019

A Banananana loaf/muffin to make basically anytime.

I hoard bananas in my freezer. Gone now are the days when I needed them as an egg substitute, but I still feel wasteful if they get to that perfect mottled ripeness and don't get eaten, so in the freezer they go. While in the summer they make a great smoothie, in the winter you need something less chilly. Before I know it I have a stash enough to make several loaves of banana bread, which is delicious and always consumed quickly. Yes, I always end up making more than one loaf because I feel wasteful (again) of the oven space. Or less often I make muffins. Either form is quick and very easily adapted-- add nuts, chocolate, coconut, even sub gluten-free flour. Everything else is probably already in your pantry -- which is part of why this recipe comes together so easily; there are no eggs or dairy to worry about picking up from the store.

Easiest Banana Loaves or Muffins
Makes 2 8 1/2 x 4 loaves or about 20 regular-sized muffins -- coat pans lightly with cooking spray or line with paper.

Dry ingredients: Whisk until combined:
I usually do 1 1/2 cups (180 g) whole wheat flour and 2 cups (240 g) regular all-purpose flour because I like the taste, and the fiber/nutrition boost. 
1 1/3 cups (235 g) sugar -- again, you can do part brown sugar or all muscovado or coconut sugar.
2 tsp. baking powder
1 1/2 tsp. baking soda
1 tsp. salt


Wet ingredients: 2/3 cup (160 ml) oil -- coconut, corn, etc.
2 1/2 cups bananas (if previously frozen, they pretty much peel themselves thawed)
 Vanilla extract, lemon/lime/orange zest or extract, nuts, chips, etc. can go in too.

If you use a mixer, put the wet ingredients in first and mix on low until the bananas are smooth. Add the dry ingredients and mix just until combined. If the bananas were very ripe, you should have a batter that holds a trail when a spatula is run through:


If it is too stiff, adjust the thickness with coconut or regular milk, or water.
 Divide evenly between the pans. It will come about halfway up or a little more.


Bake loaves at 350 about 40 minutes, turning halfway through time. They are done when a skewer or toothpick comes out clean from the middle, or with a few moist crumbs. Muffins will take about 12-15 minutes, depending on size.

Store covered at room temperature -- the loaves go quickly if you leave a table knife handy. Muffins freeze well in a zip-close bag, to be thawed individually for a portable breakfast. (spread with Nutella, they are gone even faster. But not at our [still nut-allergic] house.)

Tuesday, March 13, 2018

sourdough potato bread color experiments...

Fun with spuds! This idea had been playing around in my head for awhile, and when there were some beautiful purple fingerlings in a mixed bag I knew it was a sign that this 3-color potato bread needed making, in time to tweak a bit before Easter.
I started with the same potato/sweet potato bread used to make the hotdog buns -- by now a mere cousin of RLB's Bread Bible and blog version. I doubled the potato and used high-gluten flour in the main dough to compensate, and added some liquid starter for flavor and ease of shaping. (I don't use the milk powder or butter for allergy reasons.)

This makes one showy loaf  about 14 inches long but relatively flat, as braids go. (If you want a deeper/taller slice, you could rise and bake this in a pan, or make the ropes shorter and fatter.)
First the potatoes: boiled a regular (white) potato and the purple Vilotte (i think, they weren't labelled) fingerlings until tender, then drained and mashed. The sweet potato i cooked like i normally do: in the microwave, then mashed. I ended up with about 70-80 g of each.
Cooked and mashed potato varieties. They are in matchy bowls because i can. :D
 The sponge is mixed as normal and risen, using the potato cooking water. I then completed the dough as one, then divided it in three parts to knead in the colors of potatoes, but you might find it easier to divide the sponge into three bowls and add the other ingredients to form separate colored doughs.
The completed doughs -- kneading in the potato and oil or vegan butter. It's unintentionally a big smiley.
Shape each into a ball  then let rise covered until doubled. I put them right on a nonstick mat.
Before the first rise, and after the second.
Punch down and envelope fold, then rise another time; it should take about 45 minutes each time.
To shape, press one round into an oval, then roll up and pinch the seam so you have a tube with pointed ends, like a football... press out any big gas bubbles as you roll. Elongate the rope slightly, but keep the middle a bit thicker and the ends pointed. Do the same with the other two colors, lay them side by side, and start braiding from the middle.
Press the ends together and tuck them in. Flip the pan and braid the other end the opposite way, keeping the tension even... this keeps the shape consistent.
Cover (I use another pan to make sure there won't be sticking) and let the braid rise until it about doubles, about another 40 minutes. It should feel puffy, almost wobbly, when pressed with a fingertip.
Bake at 375 about 30 minutes. (I don't like eggwashing savory breads that don't have egg in them, especially ones that color well on their own, but you do you!)  It's done if you hear a hollow sound when tapping lightly underneath. 
Nicely colored! As you can see the white and purple strands broke a little as they rose and oven-sprang... 
The braid will have a crunchy crust when it comes out, but that will soften as it cools and the moisture distributes evenly.
My braid looked fine when it went into the oven, but as it rose and baked, the regular and purple ropes kind of fell out compared to the orange. It might be because of extra moisture from boiling, so next time I'll cook all the potato types by the same method and give up having cooking liquid in favor of ropes that keep their shape. (Of course, there will be an update when I accomplish that!)

Let the braid cool to the touch before you slice... even with the potato, it's a delicate crumb that will crush and gum up if it's too hot. But look how pretty! 


Tuesday, February 17, 2015

hotdog buns 2.0!

I seem to pick long holiday weekends to do my potato bun testing... this will be a short post, because it's just a tweak of the original. But I do have pictures!


Sourdough sweet potato hotdog buns that are vegan (dairy and egg-free), soft and have a bit of a protein boost. I incorporated some tweaks from last time: besan flour, which is ground-up beans, has 7 grams of protein per ounce, and a nice pale gold color; sweet potatoes, which aside from giving the dough color, provide a bit more moisture and sweetness; freshly-fed active sourdough starter and reduced amount of yeast; and white whole wheat flour and high-gluten flour.
The tweaked proportions:
Make Sponge: Mix together in a mixer bowl:

150 g. cooking water, 10 g. dry yeast, 100 g. besan flour, 100 g. white whole wheat flour.
Let sit at least an hour. Add:

300 g. high-gluten flour
100 g. white whole wheat flour
Mix just until incorporated, then let rest 20 minutes. Add:

365 g. active starter (6 hours after feeding)
365 g. mashed boiled sweet potato (two medium-sized potatoes)
60 g. kosher margarine
15 g. salt
50 g. dark brown sugar
Switch to the dough hook and mix 10 minutes on low speed. At first it will look too wet, but as the moisture distributes and the gluten develops, the dough will come together round the hook and clean itself off the bowl. If it doesn't after about 5 minutes, add a handful more of either white or whole wheat flour.
Once it's smooth and silky and passes the windowpane test, round it out and cooking spray the top or brush with margarine. Cover and let rise 2 hours, turn out and give two 3-folds, then let rise another 2 hours (or what I did: ferment 1 hour, 2 3-folds, then overnight in the fridge.)

We made mostly hot dog buns, 75 g. each, but also two burger buns (4 ounces/ 113 g. each) and two soft pretzels.

Let them rise, covered with a towel... 

it only took about 30 minutes -- they should just touch....


and into the oven. 

Bake at 360 until nicely golden.

Look how yummy and golden!!!

Nice and soft, but substantial enough to hold up against juicy burgers and condiments. The buns, minus two which we just had to sample, get to live in the freezer for hot lunches... yum!


Saturday, August 30, 2014

because... well, why not? Hotdog buns worth the trouble.

Vegan Potato Whole wheat Hot dog buns!
 We love hotdogs as a treat in this house, but not so much the fluffy buns which  usually have milk and high fructose corn syrup. The sturdier potato buns are more expensive, and some have egg. So I took on the challenge this holiday weekend of substantial-but-soft, flavorful allergy-friendly hot dog buns. This is an amalgamation of a few recipes -- RLB's potato buns (a shaping variation on the Potato Flatbread Pizza in the Bread Bible), this one, and my own sourdough sandwich bread. Potato buns have been on my list of to-try since yeast loves the starch, and they supposedly add a nice moist, tender quality. Sourdough for flavor and better keeping qualities -- I used/fed mine two days before and left it out, so it's not at peak rising power, but still within a good time frame.
First, potato water, yeast, mashed potatoes and some whole wheat flour, then the starter. After a 30-minute rise, more flour, salt, and sweetener and a bit of fat for tenderness. After about 45 minutes' rise (it was hot today), the dough looks promising!

Knocked down then scaled into 75 g each and rounded... the dough is a bit sticky but I didn't want to add too much flour so the pre-shape is on a nonstick mat.

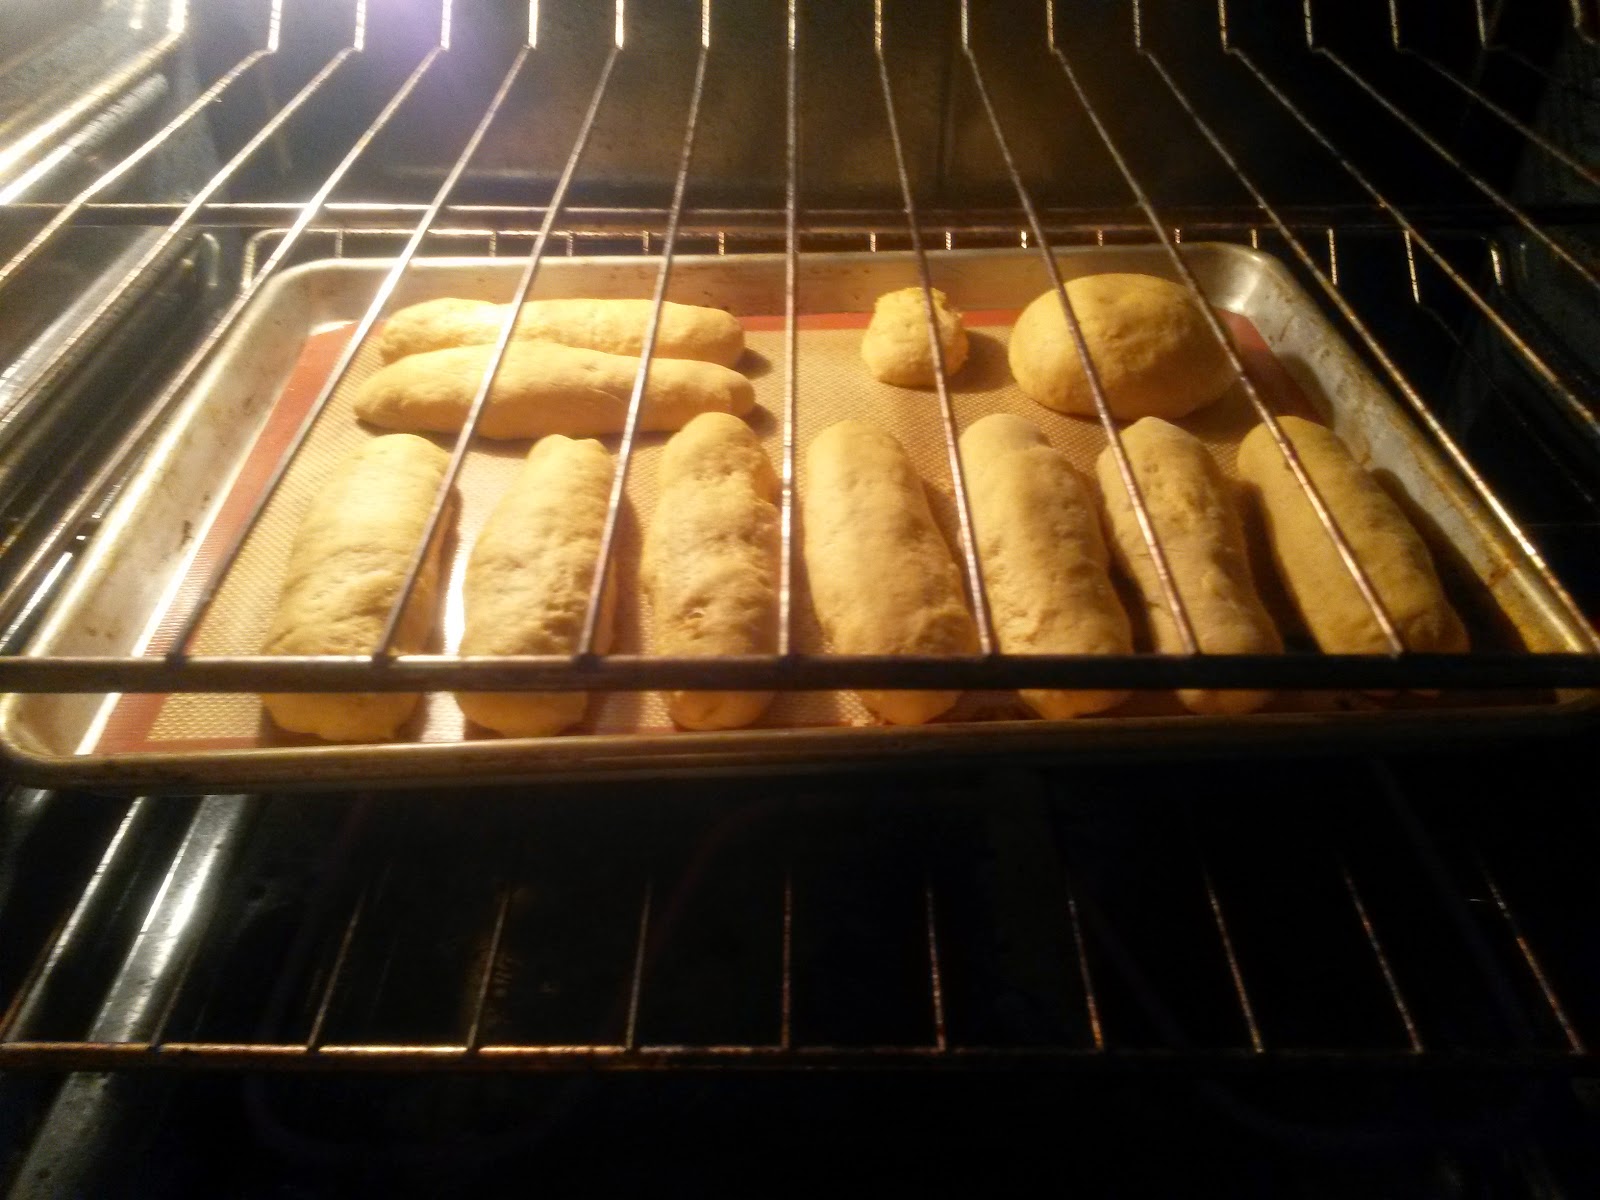
Once they are benched, I just shaped like you would a (tiny!) batard... about 1 x 6 inches. I spaced them so the sides would touch. (I used a nonstick mat and perforated sheetpan, but parchment would probably work fine.) Covered, risen about 25-30 minutes, then baked. No wash or steam, because we want them soft. They took about 20 minutes at 375 to get nicely colored on both top and bottom. They were a good color and internal temp but seemed a bit wet or heavy still,  so I turned off the oven and let them dry out a bit before removing to a rack to cool.

Perfect for lunch the next day! Lightly toasted,  they hold up well to loading up with condiments. Happy nomming!

This quantity makes 21 normal-sized buns, approximately 2  x 6 1/2 inches -- it's a good-sized batch for a KitchenAid mixer, and this type of bread freezes well anyway.
 You'll need 1 large baking potato, about 250 g/half pound before cooking; I just poked it all over with a knife, covered with water and boiled in the skin until the knife went through easily, and let cool until I could handle it. Peel and mash (with a little energetic help from a 6-year-old), saving the warm cooking liquid.

Potato sponge: Measure 227 g./1 cup of the potato water and sprinkle with 15 g. dry yeast. Let sit until it sinks, then whisk in. Measure 240 g/1 generous cup of cooked potato into a mixer bowl and paddle it until free of lumps. Add yeast water and 200 g/1 2/3 cups whole wheat flour, mix until smooth. Add 365 g/1 1/2 cups liquid (50/50) starter, mix until smooth again. Remove the paddle, cover and let rise until puffy and light. (I just leave it in the mixer and cover the whole thing with a towel.) 

Completing the dough: Mix together 350 g/3 cups unbleached AP flour, 50 g/1/3 cup ww flour, 15 g/2 1/4 tsp. sea salt, 50 g/1/4 cup raw sugar. Add to the bowl together with 60 g/1/4 cup chilled coconut oil or kosher margarine (you can use another oil, but the dough will be softer); if you want to use a liquid sweetener like agave or honey, add it with the oil. Mix with the hook until the dough is very smooth and elastic, a good 5-7 minutes. It will pull up from the sides; if it doesn't, add a handful more AP flour. 

Push down with a scraper and turn the dough out onto the counter. Fold and knead a few times to combine and distribute the moisture evenly, then lightly spray or grease the mixer bowl and return the dough to the bowl. Cover and let rise, then follow above!
(I fit 17 on a half-sheet pan, and 4 on another pan, with them completely touching once risen and fused together but easily separated once cooled. If you want them with more defined sides, better off doing 10 or 11 on each of two pans.)

This batch is enough for 4-5 more meals for us! Yay stocking up. To try next: cut back on yeast and use peak sourdough, equal parts Yukon gold and sweet potatoes, some besan flour for extra nutrition, and sesame oil/mustard; then perhaps a gluten-free version.