Thursday, December 25, 2014

wool-blend plaid ftw....

Christmas clothes, with a country bent if you will.
I do love yarn-dyed plaid -- P chose this one from my stash for a shirt for the Christmas show, Christmas in the Country. He had two lines so of course I wanted to make sure he looked presentable...
Sketchbook  (Oliver + s), suspenders, and wool blend pants from the year before.
I'd fully planned to use another pattern for K's dress, but it was nearing dawn and my eyes fell on the Little Lisette pattern i'd gotten at a discount.  So rayon velvet in a great red, and just enough left of the wool blend plaid for a gathered skirt.... 
A little fancy stitching for the neckline instead of a pierrot collar and along the snap back, along with the belt from those long-ago costumes and her new jangly boots, and we have two "country" outfits that match.


Friday, November 7, 2014

now for the boy...

Abomasnow is not really the Abominable Snowman, but a Pokemon who is close enough to that. He looks like a large amount of snow on some green fir.


At least P didn't want a generic costume! and it was easy to make this nice and warm... I already had a fluffy/fuzzy knit, super-comfy and soft, that I had planned to make a cape with. But it was perfect for what was basically a tunic and pants. (I only realized we didn't take pix of the front when we were already in the car!)


I used the Nature Walk pullover and knit pants pattern from Oliver + S, just like last year's ninja pants, cutting the top using seam allowances for a woven so it would be suitably over-sized. 
Patches in green cotton for the tail, feet and arms, supplemented by foam triangles for hands and back fins. Also, white fluffy squares on the chest that I had him cut as he saw fit.

back view... tail can't really be to scale!

The principal said no masks, so that kiboshed my plans for a finned/upward fringed attachment to his glasses. All in all, a good time was had and P was satisfied with the accuracy (and comfort) of his costume.

(I still want to reinforce/stabilize that neckline for pajama wear tho.) Win for Team Mommy-made!


Sunday, November 2, 2014

Girly costume for halloween... long live circle skirts!


This year we convinced Kikay that Avatar Korra would be the best costume evaaar. Because look, they even have the same hair.

and I was excited about the mandarin collar with contrast facings, and princess seams, and gauntlets that would help her stay warm. Plus furry bandeau skirt, leggings and boots. 
Alas, about 10 days before, she succumbed and reverted back to wanting to be Elsa like the rest of the little girl populace. 

Not that Elsa isn't awesome and a strong female, but... anyway, I decided to challenge myself to put all the costumey elements (glittery cape, spangly top, etc) in one piece, and a functional dress separately that she can use later on its own sans glitter/sparkles. A spinny skirt is both warmer and more age-appropriate than a slitted pencil skirt.
Shopping for materials at several stores -- snowflake glitter organza at Hartsdale Fabrics, bamboo rayon and sparkle dot fabric in the city (25th and 8th, can't recall the store name even if I'm there all the time), cotton for the main dress and fleece for the wig at Joann. The broadcloth for lining I already had, previously earmarked for a chef-coat for me (story of my life...).

So, step one, the hair. I followed my costume guru LiEr's awesome tutorial and made a fleece wig. I just pointed the pieces at the ends and had some tendrils in the front. (I sewed some foamie snowflakes on for embellishment after this pic.)

Step two, the top. Bamboo rayon, supersoft and kind of see-through, was perfect for the yoke/sleeves. Sparkly dot fabric, also see-through, for the sweetheart bodice part... I made a full T-shirt because both fabrics are so sheer. On the back, I sandwiched the cape (just a half-yard of the snowflake, cut in half width-wise and seamed, then gathered at the top. Elsa's cape flows onto the floor, but Kikay informed me that it would not be practical for the parade or trick-or-treating) in between the seam. I pinked the edges of the cape with my precious scalloped pinking shears. Glitter is absolutely everywhere, btw....


Last step, the dress.  She's not curvy enough to need full princess seams, so a regular fitted bodice -- with tiny 1/4" darts front and back -- sufficed. I reworked her bodice block for sleeveless armholes, a square neck and the drop-waist, and joined it, after lining, to a full circle skirt. There's a bit of patching in the back since she's getting too tall for a 44" fabric to yield a full circle. Matching silver and seafoam cupcake snaps close up the back.


So, the full look -- this was taken as we were dashing out the door for the day. She and I were really pleased -- it moves, it's pretty and reasonably warm, and we had fun.


side-note: Fail at the shoes! I didn't think about footwear, so i made some quick and sloppy silver shoe covers for some gold Toms knockoffs. You can't see them under the skirt anyway.

She wore the whole getup two days in a row (Friday for school party and trick-or-treating, Saturday for grandparents' visit), I consider it a success.


Saturday, October 18, 2014

everyday dancewear

I am such a sucker for nice print knits. Lately my focus has been on Spandex-y/Lycra-infused ones for dancewear. I have amassed an embarrassing number of them and i do intend to make them, some with matching tulle skirts.
My first attempt was based on a baby onesie that snapped between the legs... it was way too short in the body so I had to add a bit of rib knit to the midsection. But look at that harlequin/argyle!
Second attempt: I actually bought a pattern this time; overpaid a little at a brick-n-mortar store for Kwik-sew 3507, but all in all it has worked out; I've made two of the simplest possible version, short-sleeved leotards, one in a periwinkle solid and one in a very soft floral.


Bolstered by the requirement for black dancewear for practices with the dance company in the winter, my third try was a long-sleeved zip-neck with a snap opening between the legs. I tend to do this, mess with a pattern to incorporate all the features that I want... in this instance, moving the zip henley-style to the front instead of the back, making the back one piece instead of two, and lengthening the bottom to make a snap opening.

This one actually came out quite good, the sleeves were way too large for some reason but that was quickly remedied. She's worn it once already, so far so good!
(More to come: I've extrapolated another pattern from diagrams and hope to work on that next, in black stretch velvet.)
I've been way late on the pettiskirt train, but this is what I have to show for my struggles with nylon chiffon tricot and gathering on the serger: 

Two layers of plain indigo and one gold-spangled layer over top, but I could have done with another small tier on the bottom so it doesn't angle strangely at the hip. I might still do that... if somehow I can color-match it 2" wide pre-cut strips. The cutting was by far the most tedious part!


Monday, September 8, 2014

Back to school! Book.... shirt? A tutorial with pictures

I had never heard of Book Sox until my new fifth grader told me he needed them. Checked two stores and they were all out -- they are apparently some kind of stretchy book cover that comes in all kinds of patterns. Gimmicky, until the reason becomes clear: they protect the hardbound book so it can be used year after year without damage. Environmentally sound and economical for the school and thus the students. I would be on board if I could find one of the darned things.

But alas, it would take 2-5 days to ship them from one state over, the shipping being more than the cost of the covers. Can't have that, really. Must.make.clothing.for.textbook. So in an even more eco-friendly way, I asked the previously-mentioned new fifth grader to give me a  T-shirt from his outgrown stash to create one. Voila, I give you a T-shirt to Book Sox tutorial.


This is a S Youth sized shirt, and the book that it needed to cover (the book is 8 1/2 by 11, so this would be the equivalent of a jumbo Book sox). I  figured that the maximum stretch of the fabric should be running across for a taut cover, but I don't think it really matters -- especially if you have a design on the shirt you want to lay vertically versus horizontally across the front. As you can see, it's not quite enough to wrap around to the inside because the rounded cutout for the neck makes it not a rectangle. We can fix that! 


So the first thing I did was rip out the side and armhole seams, and all the hems, have a single layer to work with. That leaves a nicely rounded piece from the sleeve to patch the neckline with, and the stretch even runs the same way. So pin and stitch that in place.

See how you now have enough to wrap to the inside. 

We'll stretch and pin each corner -- working with the wrong side facing out so that it is ready to sew. Don't worry about bunching up on the spine for now, just pull until the outside is nice and taut. Pin each corner. If your shirt is big enough, it will come all the way to the spine. Pin in a diagonal to end at the corner.

Close the book to check the fit once all the corners are pinned. Note that the spine still has the extra fabric at top and bottom.

Take the fabric off the book, making sure the pins stay put and aligned pointing to the corner. 
Sew each corner -- the line marked to the left of the pin. I used a serger to sew and trim at the same time, but use whatever stitch you use for knits or stretchy fabric. Trim the seams if you haven't yet.

This is what the cover will look like once the corner seams are sewn and trimmed (still inside out.)

Measure from edge to edge, and mark the middle of the top and bottom.

Make slits at the marks for the fabric to wrap up from the bottom and down from the top, to take care of that extra fabric at the spine. After doing that, I serged all the edges to neaten and reinforce them. 
Sorry this pic is so blurry, but you can see the inside corners are not quite stretching enough, because the fabric didn't go all the way to the spine on the inside. 

To take care of that, I sewed elastic between those two corners to pull them together. (and the same for the back too.) I used clear 3/8" elastic because it's very flat, but it doesn't really matter what you use. If the T-shirt you use is big enough to wrap completely over the inside, you won't even have to use the elastic. 


This is what the book shirt looks like finished (right side out this time.)

And this is what it looks like on the book. 

hurray for upcycling! And of course for a one-of-a-kind, easily recognizable book protector. Actually there is still the back of the T-shirt for a whole other bookshirt -- bonus if you use a shirt with designs on both back and front!

 Best of all is Popoy's comment: "It will be nice to have something that my mommy made in my school locker." I am such a sucker for appreciation.


Saturday, August 30, 2014

because... well, why not? Hotdog buns worth the trouble.

Vegan Potato Whole wheat Hot dog buns!
 We love hotdogs as a treat in this house, but not so much the fluffy buns which  usually have milk and high fructose corn syrup. The sturdier potato buns are more expensive, and some have egg. So I took on the challenge this holiday weekend of substantial-but-soft, flavorful allergy-friendly hot dog buns. This is an amalgamation of a few recipes -- RLB's potato buns (a shaping variation on the Potato Flatbread Pizza in the Bread Bible), this one, and my own sourdough sandwich bread. Potato buns have been on my list of to-try since yeast loves the starch, and they supposedly add a nice moist, tender quality. Sourdough for flavor and better keeping qualities -- I used/fed mine two days before and left it out, so it's not at peak rising power, but still within a good time frame.
First, potato water, yeast, mashed potatoes and some whole wheat flour, then the starter. After a 30-minute rise, more flour, salt, and sweetener and a bit of fat for tenderness. After about 45 minutes' rise (it was hot today), the dough looks promising!

Knocked down then scaled into 75 g each and rounded... the dough is a bit sticky but I didn't want to add too much flour so the pre-shape is on a nonstick mat.

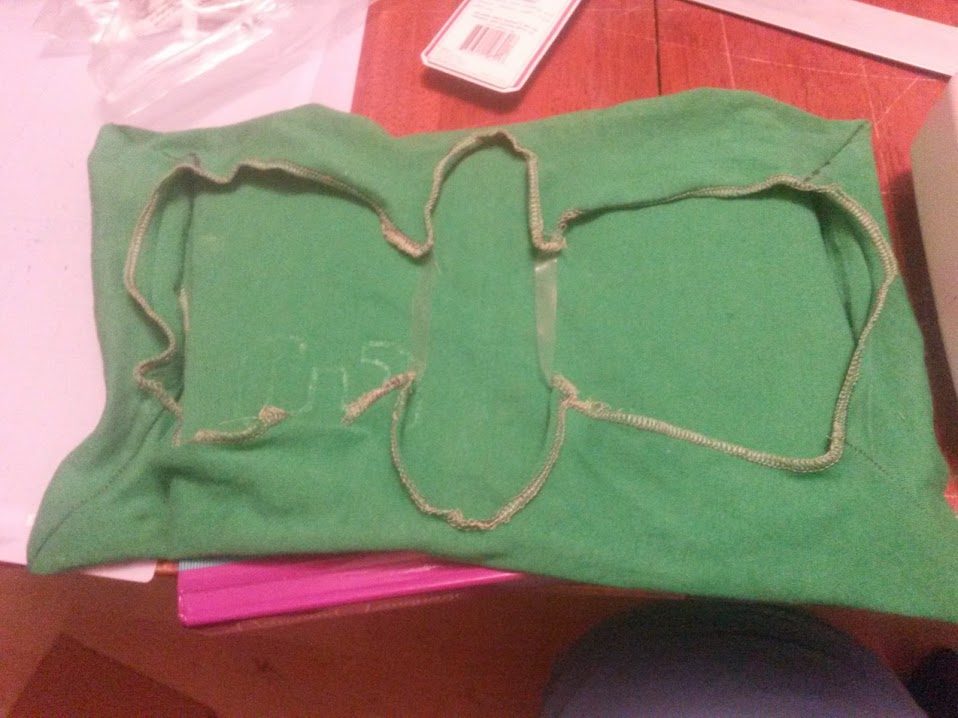
Once they are benched, I just shaped like you would a (tiny!) batard... about 1 x 6 inches. I spaced them so the sides would touch. (I used a nonstick mat and perforated sheetpan, but parchment would probably work fine.) Covered, risen about 25-30 minutes, then baked. No wash or steam, because we want them soft. They took about 20 minutes at 375 to get nicely colored on both top and bottom. They were a good color and internal temp but seemed a bit wet or heavy still,  so I turned off the oven and let them dry out a bit before removing to a rack to cool.

Perfect for lunch the next day! Lightly toasted,  they hold up well to loading up with condiments. Happy nomming!

This quantity makes 21 normal-sized buns, approximately 2  x 6 1/2 inches -- it's a good-sized batch for a KitchenAid mixer, and this type of bread freezes well anyway.
 You'll need 1 large baking potato, about 250 g/half pound before cooking; I just poked it all over with a knife, covered with water and boiled in the skin until the knife went through easily, and let cool until I could handle it. Peel and mash (with a little energetic help from a 6-year-old), saving the warm cooking liquid.

Potato sponge: Measure 227 g./1 cup of the potato water and sprinkle with 15 g. dry yeast. Let sit until it sinks, then whisk in. Measure 240 g/1 generous cup of cooked potato into a mixer bowl and paddle it until free of lumps. Add yeast water and 200 g/1 2/3 cups whole wheat flour, mix until smooth. Add 365 g/1 1/2 cups liquid (50/50) starter, mix until smooth again. Remove the paddle, cover and let rise until puffy and light. (I just leave it in the mixer and cover the whole thing with a towel.) 

Completing the dough: Mix together 350 g/3 cups unbleached AP flour, 50 g/1/3 cup ww flour, 15 g/2 1/4 tsp. sea salt, 50 g/1/4 cup raw sugar. Add to the bowl together with 60 g/1/4 cup chilled coconut oil or kosher margarine (you can use another oil, but the dough will be softer); if you want to use a liquid sweetener like agave or honey, add it with the oil. Mix with the hook until the dough is very smooth and elastic, a good 5-7 minutes. It will pull up from the sides; if it doesn't, add a handful more AP flour. 

Push down with a scraper and turn the dough out onto the counter. Fold and knead a few times to combine and distribute the moisture evenly, then lightly spray or grease the mixer bowl and return the dough to the bowl. Cover and let rise, then follow above!
(I fit 17 on a half-sheet pan, and 4 on another pan, with them completely touching once risen and fused together but easily separated once cooled. If you want them with more defined sides, better off doing 10 or 11 on each of two pans.)

This batch is enough for 4-5 more meals for us! Yay stocking up. To try next: cut back on yeast and use peak sourdough, equal parts Yukon gold and sweet potatoes, some besan flour for extra nutrition, and sesame oil/mustard; then perhaps a gluten-free version.


Thursday, July 17, 2014

Ch ch ch changes.... Chevron Chenille chardigan


In pursuit of cotton chenille... 
I originally bought 3 colors in one brand and two in another to make a Fair Isle type sweater, before realizing that the kiddo would fall over from the weight of cotton stranded.
Then a scalloped-hem Easter bolero, but frogged because k5tog is no fun in a yarn with no give. 
Finally, a chevron cardigan, but K will not wear it without pink. The company that made the 3 colors is out of business, and the company of the other 2 sells some but not many solids, and seems to cycle out colors regularly… (Did I mention that an internet search led me to a store that had the prints for $1 each? I ended up buying enough for sweaters for dd and two goddaughters. Zipping along on Children’s Tunic in a sz 10, with another one in sz 8, possibly a cardigan.) 
Searched high and low, settled for another chenille that was not quite the same weight or texture, before stumbling upon a Raveler's trade stash of that discontinued color, which she sent me!

comparable colors in two brands:
Cottage Knits blue : Crystal Palace French Blue 8095; Casco Bay 123 is not quite dark enough, but okay. Dd suggests turquoise (CP 3503 Blue Pool or CB 127) would be good too.
Cottage Knits grass: CP 2342 Fern is a bit too yellow; CB has 236 which is too yellow and 210 which is too blue, both totally different.
CK lemon: CP 3646 Yellow is too light, but 3505 Corn Silk is too gold; CB 110.
CP 8211 pink is discontinued, but CP 1219 Bougainvillea is close; CB 117 might be best match but not blue enough.
CP grape is discontinued, but CP 9660 Royal Purple; CB 221 is a bit too dark but okay.
CP orange is discontinued, but CP 2230 Mango; CB 115. 
(Henry's Attic Cotton Chenille 900 is a good gauge match but of course comes only in natural -- if you want to dye your own.)
note that the ball bands suggest sz 6 needle but I did this in sz 8 -- a slightly more drapey, looser resulting fabric.

I just made it up as I went along, this would fit until a size 8 or so as written, but easily customizable for length. This sweater took most of 6 skeins, one of each color. I kept the color-striping to 4 rows mostly, but if you choose to have fewer colors you might need two skeins of one or another.

Chevron Pattern: (multiple of 12,+2)  k1, *k1, yo, k4, s1-k2tog-slip, k4, yo* k1. Purl next row.
--> s1-k2tog-slip is a double decrease that doesn't lean; feel free to substitute another as you prefer.
Gauge: 4.5 st/inch on size 8 needles in stockinette. Chevron is approximately 2 2/3 inches wide per repeat.

Body: 
Long-tail cast on 148 st. Purl 1 row, then start chevron pattern. Place markers at 32 st and 116 st (as chevron pattern develops, you have 2 1/2 repeats for right front, 1/2 6 1/2  for back, then 2 1/2 repeats for left front.) 
Continue until 12" at a point. Divide for back and fronts: chevron as usual but onto holder until first marker. Chevron the back to the second marker, then chevron onto another holder. 
CO 1 st for seaming on each edge, then continue back as established until it measures 20". Bind off.
Right front as worn: Cast on 1 st, then start to decrease on the neck edge: every 4th row (color change), k1, yo, k1, ssk, k1, s1-k2tog-slip, k1, k2tog, k1, yo. Continue chevron pattern
to end of row. Work until same length as back, then bind off.
Left front as worn: work decrease on opposite neck edge.

Sleeve: Long-tail CO 46 stitches. Purl 1 row, then chevron until measures desired length or 15". 
Stockinette without chevron patterning (k 1 row, p 1 row) 2-3 rows, then bind off..

Sew seams, then stabilize shoulder seam with seam tape if desired. Pick up stitches all along neck edge for hood -- starting approximately 1 inch from shoulder seam, 100 stitches. k2 instead of k1 at start to keep the edge.  Work even (if desired, can increase at center back after about 2 inches, then decrease back at 8 inches) until hood measures 10 inches from nape. Stockinette 2 rows then three-needle bind-off on the wrong side, or keep in chevron then interlock-seam or kitchener.

Button bands: Using sz 6 or 7 needle, pick up 42 stitches along left front edge. 1x1 rib for 4 rows, then bind off. 
For buttonhole band, pick up 42 st along right front edge. 1x1 rib for two rows. 
Row 3: k1, p 1, k1, bind off 2, rib for 9 st, bind off 2, rib for 9 st, bind off 2, rib for 9 st, bind off 2, rib to end.
Row 4: 1x1 rib, cast on with backwards e over all bound-off st. 
Row 5: 1x1 rib. Bind off in rib.

Sew on buttons. (after I spent a crazed amount of time at the button rack to get options that were not quite right, we decided I should make rainbow buttons from polymer clay.) 


Thursday, June 26, 2014

Birthday Tea -- dress, drinks, and yums

For HRH K's birthday, riffing off a suggestion by her namesake Auntie Franne, we decided to have people over to tea at Alice's Tea Cup, a pretty, darling little series of tea shops in the city.
Likewise, it was decided that there must be tea dresses, with gloves. She drew it, including the gloves, and specified that there should be a v, and a collar that comes up the neck like Snow White's.
She selected the fabric from my stash, and away I went with the drafting. The overall shape is similar to the father-daughter dance dress, but a bit looser and with darts in concession to the woven vs knit fabric. The bodice is the basic shape of the Fairytale Dress from o+s but cut with a v-neck, and snaps instead of a zipper; the skirt is an easy-peasy 24" long circle skirt, gathered to fit the lower edge of the bodice -- thank God for 60-width fabric. The gloves took some doing, but basically a hand traced onto light jersey and edged with the same embroidered organza as the collar.


Tea noms included chicken fingers, scones (berry, pumpkin and s'more), finger sandwiches, lemon tartlet and cake, all on a tall stand, with two kinds of tea (and apple juice) to slip it all down with. And some of the unlikeliest fairy-dust wielders to ever.

Monday, June 23, 2014

Catch-up uniforms post!

Did I not post about this like a dozen times already? Just adding this for the sake of completeness:

Long-sleeved peter-pan collar blouses for wearing underneath the jumper in cold weather, variations on the old standby Burda pattern. Left is broadcloth with large clear buttons so she can do them herself, and right is a cotton knit (with floats on the underside, I have no idea where I got it or what it's called) with snaps. Not in this pic is another broadcloth one with pearlized shank buttons; the knit one is my favorite but I have no idea where to get more of this fabric.


This is the final iteration of school pants: in wool-like polyester, similar to the fabric of my uniforms long ago. Based on the Burda pattern still, but with fly shield, adjustable elastic waist, back welt pockets, knee reinforcements, hook fly, and belt loops. I think he has enough pants now! Just hope there's enough length in them so I don't have to make more next year. Already let the hem down on the first pair....


"Sunday best" graduation dress


I have had this McCalls M6312 pattern in my stash forever and ever, and planned out the fabric and bias tape from my stash as well. But it never got cut and sewn until now because I kept finding other patterns I wanted to do more... good thing this past few weeks have been a bit crazy so I didn't have much choice but to go with what I had instead of spending hours looking at new patterns and fabric.


My friend Margaret gave me this fabric more than a year ago. It was going to be a dress for me but nah.
As I was cutting it I knew it was going to be wide.... Also the instructions, or more specifically the order of assembly, seems kind of weird. But it came together and looks decent enough for a day when she needed a special occasion dress, and got a few compliments as well. I definitely have some bigger pattern alterations when I make this out of coordinates, though.

Sunday, June 8, 2014

On a dime specialty cakes are the best, and worst.

A quickie mortar board cake put together in about 30 minutes... since, y'know, zero time and no notice. The chef of this restaurant comes to us needing cake for that night. Not the first time, but he got us on Page Six last time so it's okay.

He comes at 1 or so, shows me a blurry phone pic, needs it by 4. Sure, but I still have other cakes to finish and I'm leaving at 2:30 to go set up a wedding cake for my boss' brother.
Cake baking not included (Dude, you're paying for what we've already got to give you.), but carved, covered, iced and decorated in between other projects. Whoo!

Sunday, April 20, 2014

Easter with Oliver+s year 3!


(Forgive the awkward, first time blogging from my phone.) Continuing in my 3 years of O&s patterns, I give you the Garden Party dress!  Since Easter weather is so  unpredictable (even literally the night before, which was when I bought, printed and assembled the pattern, and cut and sewed the dress)  I added length to the sleeves and a little gathered cuff just for fun. Yes I am that crazy person who does this as an all nighter before working the next day-- approximately 5 hours start to finish. The butterflies is from City Quilter and the sage green cotton challis is stash from the NYC fabric district... Paron maybe?
I loved the way it came together, and the  gathered detail. Mods for the future: lengthen the bodice (maybe two gathered sections and two bands) for a natural waist, and change the back opening to accommodate that.