Showing posts with label cake. Show all posts

Monday, March 6, 2023

Finally back into the spotlight -- a procrastinator's tale


Lately, layer cakes have been the order of the day. Admittedly there are so many recipes out there, but sometimes there arises a unique challenge that makes me nerd out and put earnest effort into reinventing the wheel. 

It may be a red velvet cake with a better crumb, it may be a white cake with lightness but body to support sprinkles, it may be a yellow cake with the texture of chocolate cake. 

This is not one of those; instead, the formula for this cake sat on the back burner for almost 15 years after I developed it. I wanted a butter cake with forward nut flavor, moist crumb, and a feathery texture -- most of what I encountered were serviceable yellow cakes with a smattering of nuts, or thin sponges that were layered with rich filling, or dense financiers that negated any icing, or short crumbly slabs that were more cookie than cake. The goal was to be able to use any nut flour or pulverized nut to make a fillable, frostable layer cake -- a tall one that could be filled into a 5 or 6 -inch high tier, with the fine nut pieces evenly suspended and not sunk to the bottom. Marching in time with this idea was using a nut butter, or turning praline paste into a cake -- more on that to come.

I used a version of this as my own wedding cake -- a cashew praline cake filled with blueberry five-spice compote and frosted with white chocolate ganache buerre. It was good but not great, a little on the rich and heavy side. I kept tinkering with the balance of ground nuts and fats with various nut products and pastes, with particular attention to mild cashews and elusively-flavored pistachios making up a larger percentage of the dry ingredients than i had seen in others.

A version rolled out at another teaching gig later, a 2-layer 10" cake with hazelnuts and almonds, filled with apricot jam, and frosted with semisweet ganache buerre praline. It was a good cake but not a long lasting gig. Along the way, my two kids were diagnosed with virulent nut allergies, so this cake template stayed shut away from my home kitchen. The next jobs i had didn't need layer cakes, or had no opportunities for tinkering, or or or.

Not speaking of the Years that Were, I thought about remaking a tier of our wedding cake for our 20-year anniversary this past September, but again, not in the house. I rediscovered some old teaching materials from that time recently and vowed to resurrect this gem. The cake trend landscape was changing too, with small diameters stacked high instead of larger 2-layer cakes. New chances, new flavors, as well as a retinkered finishing.

Yes, it is more fall-flavored than spring, but there is still time ... isn't there always?

Caramel Apple Walnut Cake

Walnut layer cake  – 3 8” layers

242 g ground walnuts

420 g all purpose flour

1 ½ tsp baking powder

½ tsp baking soda

1 tsp salt

280 g unsalted butter, softened

420 g sugar

220 g eggs

345 g buttermilk or plain low-fat yogurt (not Greek)

Combine dry ingredients. Cream butter and sugar until light and fluffy. Add eggs and beat until emulsified; scrape down well. Alternately add dry ingredients in 3 parts with buttermilk or yogurt in 2 parts, scraping down between each addition. Fold through with a spatula. Divide evenly into 3 pans. Bake at 325 until cakes spring back. Cool 15 minutes, then unpan onto a rack to cool completely.


Apple filling

Peel, core and dice 5 golden delicious or honeycrisp apples. Add 90 g sugar and a pinch of salt, tossing to draw out moisture. (optional: add 1/2 vanilla bean, seeds scraped. Or use vanilla sugar.)

Melt 56 g butter in sauteuse or skillet. Add apple dice and coat with butter. Cook, covered over low heat, until juices release. Mix together 25 g cornstarch, 1 tsp cinnamon and 45 g sugar; stir evenly into apples. Cook until thickened. Add 1 tsp lemon juice. Allow to cool.


Caramel buttercream

488 g unsalted butter, cold

450 g granulated sugar + 25 ml corn syrup

210 g cream

12 g sea salt


Cut butter into 1” cubes and place in freezer while making caramel.

Over high heat in tall saucepan, make a dark caramel with the sugar and corn syrup.

Whisk in cream off heat (it will spatter and rise a lot in the pan, be careful.) Return to heat, stirring until smooth.

Add 60 g of the frozen butter cubes to hot caramel, stir in, transfer to mixer bowl. Cool to just warm -- approx 120F-140F. Add salt and remaining butter cubes. Emulsify with whip on low speed first to avoid splashing, then whip until aerated and creamy, scraping often. The caramel base will want to stick to the bottom of the bowl and the butter will want to clump inside the whip, but as the emulsion forms, scrape the caramel up into the cooler butter. Finish with paddle on medium speed for maximum smoothness -- it will take awhile, passing through a curdled phase before smoothing out when there is enough air.


Trim cakes level if necessary. Place one layer on a cake circle and apply a thin coat of the buttercream and a dam around the edge. Fill in with the cooled apples. Repeat, placing last layer bottom side up. Frost with buttercream on sides and top and garnish with caramelized walnut halves, dried candied apple peels and sea salt.


Thursday, September 1, 2016

Orphaned blog!

My poor neglected blog!!! I've all but forsaken you for Instagram and Pinterest. I promise to post all the summer sewing soon.
In the meantime, have some pretty pictures of what's been baking this summer:


Peach pie!

Plum - apricot biscuit cobbler (did you know it's still a cobbler if it's cake batter?)

Using dental floss to cut a log of cinnamon rolls

As luck would have it, I taught a kids' baking camp for a week this summer but didn't take any pictures (anyone reading this from that?). So maybe we'll revisit some of the things in that menu package, with my own non-school spin on them.

Updates soon!

Thursday, June 26, 2014

Birthday Tea -- dress, drinks, and yums

For HRH K's birthday, riffing off a suggestion by her namesake Auntie Franne, we decided to have people over to tea at Alice's Tea Cup, a pretty, darling little series of tea shops in the city.
Likewise, it was decided that there must be tea dresses, with gloves. She drew it, including the gloves, and specified that there should be a v, and a collar that comes up the neck like Snow White's.
She selected the fabric from my stash, and away I went with the drafting. The overall shape is similar to the father-daughter dance dress, but a bit looser and with darts in concession to the woven vs knit fabric. The bodice is the basic shape of the Fairytale Dress from o+s but cut with a v-neck, and snaps instead of a zipper; the skirt is an easy-peasy 24" long circle skirt, gathered to fit the lower edge of the bodice -- thank God for 60-width fabric. The gloves took some doing, but basically a hand traced onto light jersey and edged with the same embroidered organza as the collar.


Tea noms included chicken fingers, scones (berry, pumpkin and s'more), finger sandwiches, lemon tartlet and cake, all on a tall stand, with two kinds of tea (and apple juice) to slip it all down with. And some of the unlikeliest fairy-dust wielders to ever.

Sunday, June 8, 2014

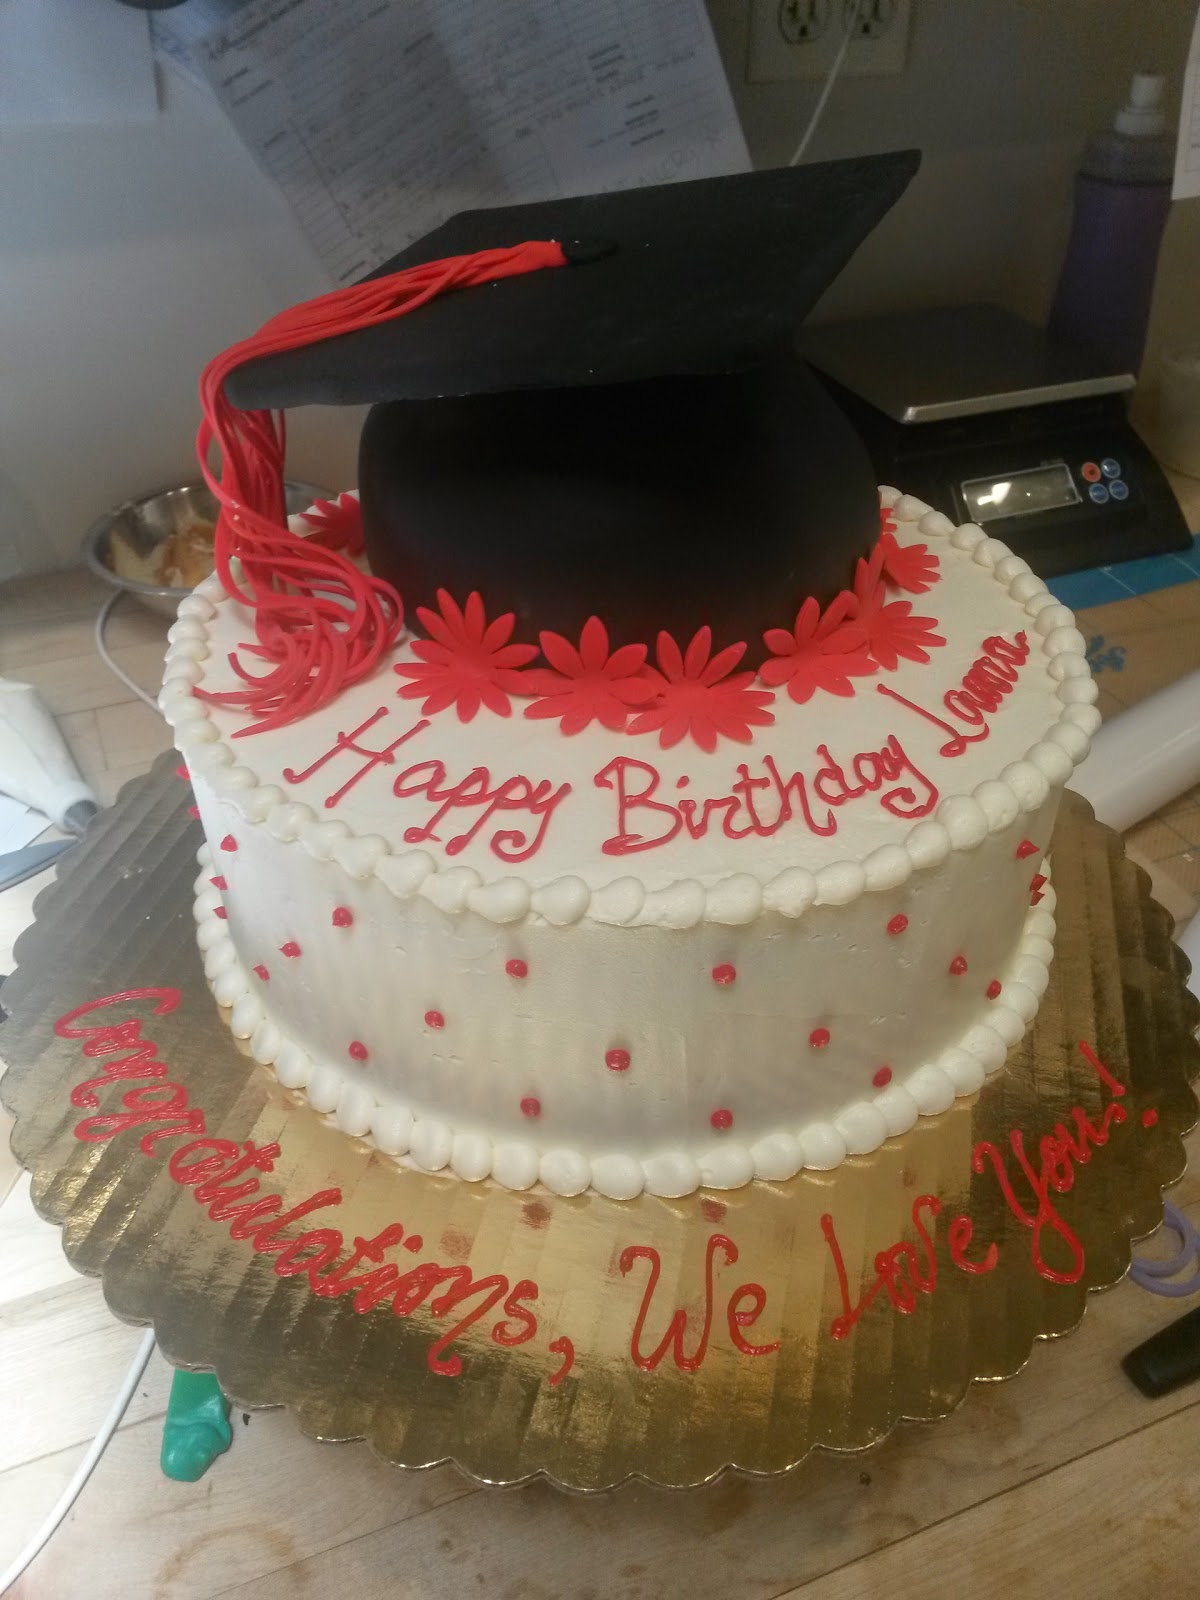
On a dime specialty cakes are the best, and worst.

A quickie mortar board cake put together in about 30 minutes... since, y'know, zero time and no notice. The chef of this restaurant comes to us needing cake for that night. Not the first time, but he got us on Page Six last time so it's okay.

He comes at 1 or so, shows me a blurry phone pic, needs it by 4. Sure, but I still have other cakes to finish and I'm leaving at 2:30 to go set up a wedding cake for my boss' brother.
Cake baking not included (Dude, you're paying for what we've already got to give you.), but carved, covered, iced and decorated in between other projects. Whoo!

Sunday, April 13, 2014

Dalek cake sort-of tutorial!

Exterminate!!! No fancy way to beat this Dalek, just eat it. I started out with the idea of making a Dalek cake because -- well, because it's a Dalek and I love Doctor Who! A fellow geek's birthday was the perfect excuse.
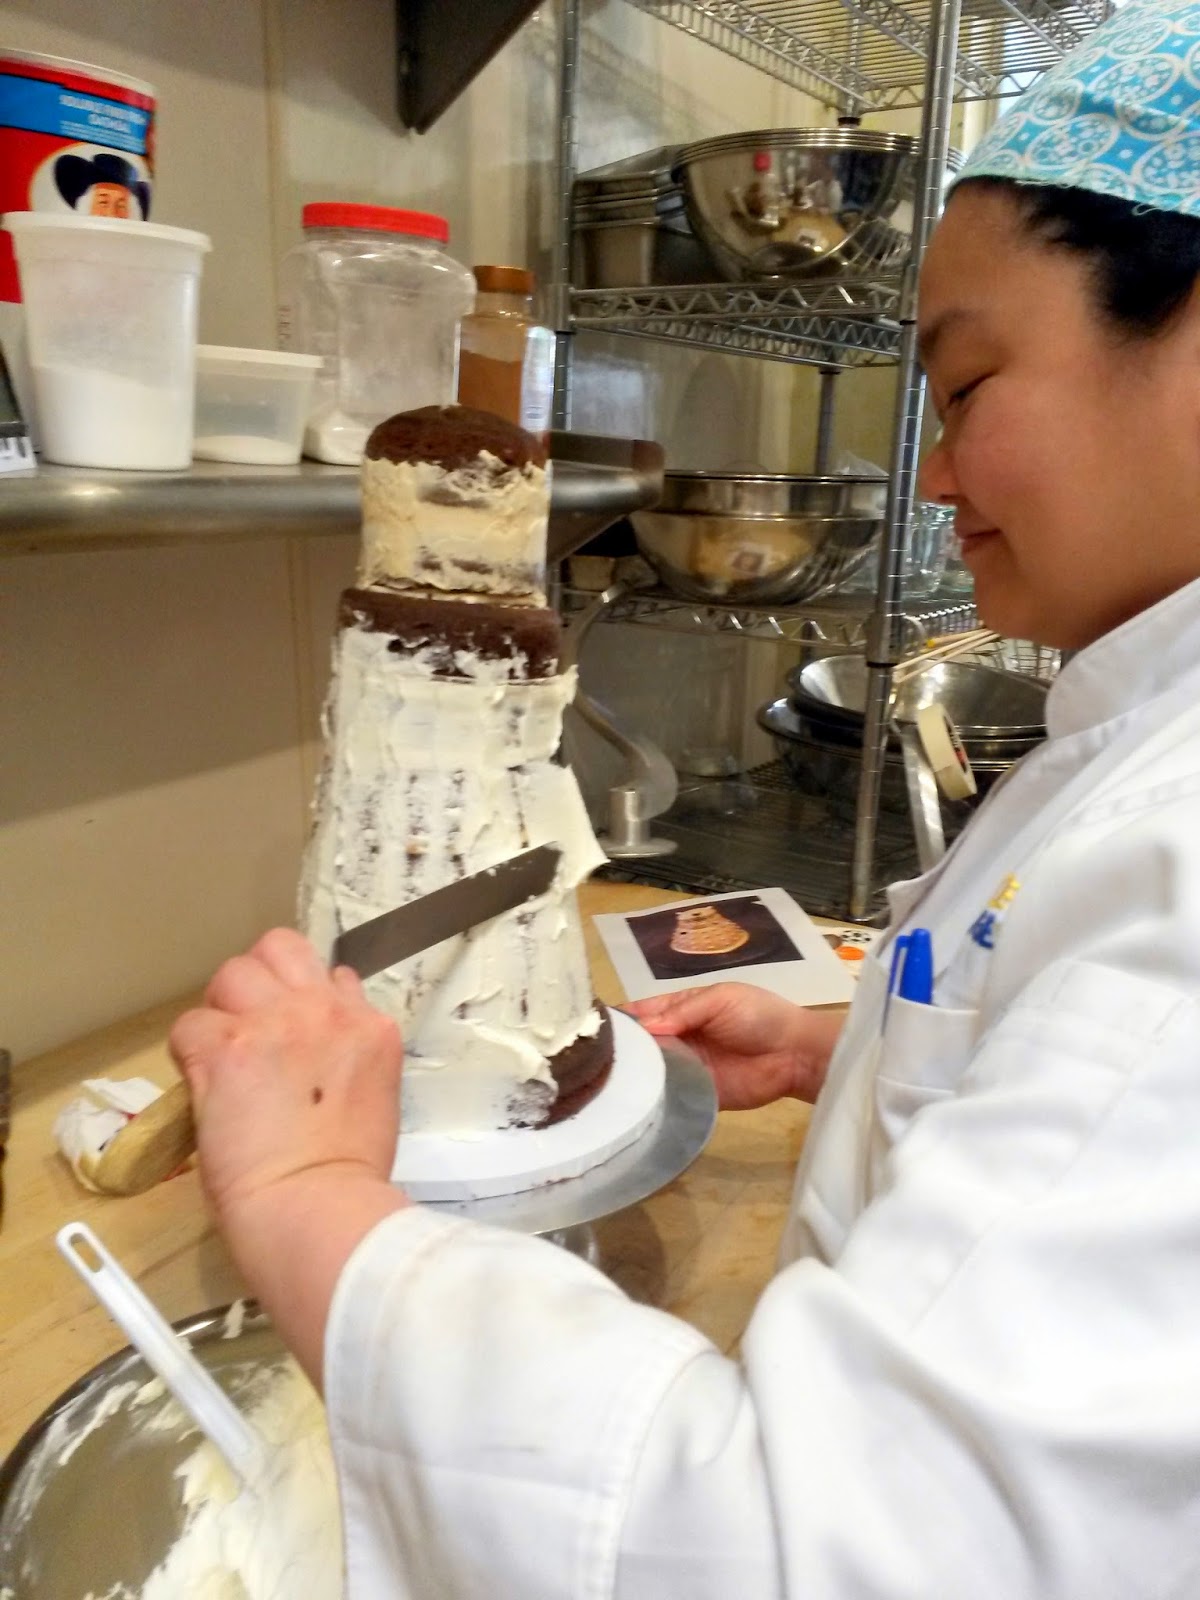
First, chocolate cake layers: 2 each 4 inches, 5 inches, 6 inches and 7 inches, and 1 8 inch layer. In retrospect, the 4 inch layers rose so much that I could have gotten away with less in each pan, but the dome provided a good enough base for the round top that I trimmed the corners and was done. The second 4 inch layer was trimmed flat.  
For stability and flavor variation, I divided the cakes into sets of three (each set on its own cardboard base) -- with the top three being filled with peanut butter frosting, the middle three with coffee frosting, and the bottom three with chocolate frosting. When stacking, instead of centering, I kept the back edges close (but not quite flush) to maintain a backward slope that was flatter than the forward one. 
Four lollipop-stick dowels went into the bottom set, to support the weight of the top two cakes. (if I do this again, maybe three in the middle set as well.) After chilling, I put them all together as a stack and staked the entire thing with a sharpened 3/8 inch wooden dowel to go right through to the drum. 
I carved the bottom 5 inch, 6 inch and 7 inch cakes into the required slope and tapered the front of the 8 inch to a point.

Manipulator arm, gunstick, and eyestalk on lollipop sticks. I added tylose to the black so the plunger shape would dry unsupported. (The light receptors were on half-sticks for support as well.)

Crumb- coating the whole thing with vanilla frosting, then a sojourn in the freezer. It was hot that Saturday!
I covered the 4 inch top part with a small piece of purple fondant to get the dome perfect, then the majority of the "skirt" with a separate piece, like a cape, overlapping at the 5 inch "shoulder", with the seam running up the back. The gray strips for the base and shoulder were rolled out thicker. The ropes for the neck could have been more angular, now that I look at it objectively.

I made 36 of the "buttons" out of gray fondant and sprayed them silver. In retrospect, chocolate pistoles or candy melts sprayed silver are the perfect size. Not sure how 56 would fit, Tardis Data Core... 14 sections do not look right, even 9 was a pinch. Granted, I put a black control panel in the back to hide the ugly seam. 10 would look good if the back seam was perfect.


Sunday, August 18, 2013

Cupcake one-shoulder birthday dress!

I can't believe I forgot to make a post about the cupcake dress! 
For K's birthday, she chose the cupcake fabric I'd just gotten, of course. Like these things do, a one-shouldered, breezy classic but modern dress with giant bows popped into my head. Obviously I wasn't going to find a pattern for that, so I drafted one.


two giant bows on the shoulder.


I used my basic bodice draft that I use for most of her dresses. Any bodice pattern without closures will do, as long as it fits the chest and has a scoop neck. You want it to fit over the hips or head without struggle, so loose rather than tight -- she's five and narrow, this was 13 inches across including a 1/2" seam allowance.
First, do the one-shoulder by drawing a line sweeping up from the armscye to the opposite shoulder -- it should angle up about 35 degrees from the horizontal, because you don't want it hanging too low in front. 
I decided to do two straps on the same shoulder, which helps fine-tune the fit because the inner one takes care of the cross-bodice and the outer one takes care of the height -- my pet peeves when it comes to little girls falling out of their summer dresses. Just extend the shoulder into straps,widening so they make nice big bows when tied -- mine were about 10" up from what was the shoulder seamline. As for the bottom, from here it can be empire or drop waisted, or even A-line. I decided to go with a slight drop waist so as to eliminate the need for elastic but allow for a gathered skirt. Curve up at the sides for a nice line.


Cut two out, it doesn't have to have a front and back as long as you cut them with the fabric folded (so that one has the ties on the left, and one on the right when you look at the print...) Since it's a summer dress out of quilting cotton, it needed a lining -- I think this one was $2/yd at my neighborhood place? White for the bodice and pink for the skirt, to pick up the silly colors. So, two of the print and two of the lining. 

You'll also need rectangles for the skirt, I usually go for the full width of 45" and about 12" long, just a basic rectangle, with the short sides seamed up, hemmed and gathered. (I love gathering now that I have a serger!) Remember to have the seam of the lining face out so it doesn't rub. It's fine to gather the lining and the print to the final measurement of the bodice bottom (24 inches, in this case), and set them aside.

To sew up the bodice, start at the bottom of the left armhole and pin a lining piece and a print piece together, right sides facing. Stitch all the way around the gnarly strap parts, coming in quite tight and going up again between the two straps ( i ended up fudging the seam allowance a bit at the lower point, it's more like 1/4"... so it's not too narrow to turn.) You can decide now whether you want the ties to come to a point or be squared off. Clip deep into the corners and V, and turn the whole right side out (a chopstick helps with turning the skinny ties). Do the same thing for the second set of lining and print fabric.  
Then pin and sew each side seam all together on the inside, starting with the bottom edge of the lining and finishing at the bottom edge of the print continuously from the edge of the lining to the edge of the print. You don't have to finish the seam allowances if the dress is fully lined. 

Sew on the skirt (either all together, or the print to the print and the lining to the lining, so seams are inside), turn it right side out, and press. (I added contrast topstitching all around the top edge to define the line, but that's just my thing.) 
Make some cupcakes and party on!


Friday, May 10, 2013

Red April

Last month was all about red... Riding hoods, buttercream roses, velvet cakes. Thirty-one, fifteen (or was it 20? on a pink cake no less!) and countless layers (I'll hazard at least 16-17 all together -- rounds and sheet cakes combined.)
It's funny how staring at a color that you don't particularly care for a lot makes you see the subtle differences and you find yourself splitting hairs between shades. To wit, cotton voile from the independent fabric store comes in red... no problem, it's soft and natural and is a good price point. Circle over to the chain store and broadcloth is poly-cotton, comes out cheaper on sale and comes in 3 shades of red. Choices!! Lollipop or Tango? I like Tango better but bought more of the other shade because the sale crowds were frustrating... had to go back the next day and got more at a different price.
 If someone unlocks the logic of those frickin' sale policies, please let me know.

oh, and one last red thing: 


Monday, February 25, 2013

taking a tumble...


finished this cake today for a customer who wanted "a bear on skis, with trees and mountains?"