Sourdough has a rep for being the no-nonsense, savory, earth-attuned kind of bake-craft. Doughnuts are the opposite of that -- fried, usually pretty sweet from being sugar-tossed or glazed and/or filled, with endless permutations of dress-up. There is the cronut, a hybrid of the flaky layers and oil-cooking, but even that has the frippery of lamination.
Given that I put starter in everything, is it any wonder that Sacchi would eventually find her way into doughnut dough? I consider this my last goodbye to a workplace that has seen me through some pretty cool, and some pretty rough, times, including many a doughnut station.
Why has it taken me this long to put up a post about these doughnuts I've been making for years? I really don't know.
Raised doughnuts are fried yeast dough; in theory, one can toss any kind of bread dough into boiling oil and out will come some semblance of satisfactory vehicle for glaze and filling. But good doughnuts are sweet dough, not too tough and lean like baguette dough, and not too high in fat, eggs or sugar that they disintegrate into the hot oil or sponge it up into soggy greasy sadness.
So what you need is a dough with enough structure to hold its shape as it rises, but soft enough so that the hot oil can cook the mass through in the time that it takes to brown the outside. Tender, flavorful but not too overwhelmingly bready, and with good handling so you can shape, rise and cook without panic.
(Cake doughnuts are another thing entirely. More thoughts on those another time, since of course. That other staple, fried choux/ French crullers, is again a different situation to talk about.)
Sure, you can fry brioche... but one doesn't need to go through the process of a sponge and careful gradual incorporation of butter if you're going to fry it, really. And brioche lacks the wherewithal to stand the manipulation that doughnuts must undergo. Best to leave brioche as little rolls or loaves that never see the fryer, and instead make a simpler dough which uses well-aged natural leavening to boost lightness and dexterity as well as flavor.
It's good to have all the ingredients on the cool side of room temp, as the mixing of the hook warms them up to the ideal fermenting zone.
Sourdoughnuts -- makes approximately 30, depending on size
225 g active starter
3 eggs
45 g sugar
7 g dry yeast, mixed with 15 g water
300 g bread flour
7 g sea salt
95 g butter, cubed
In the bowl of a stand mixer, combine the starter, eggs, sugar and dissolved yeast. Mix with a hook until the yolks are evenly dispersed.
Add the flour and salt and mix for 6 minutes on low speed. Look for the dough to be dry at first, then get sticky as the flour hydrates.
Add the butter cubes and mix another 2 minutes, then 5 minutes on medium speed. The dough should be smooth and elastic, and stick to itself more than the bowl. If it doesn't, add a bit more flour and mix until it does.
Turn the dough into a greased square or rectangular container that can contain double its volume. Cover with plastic wrap and let rise in the fridge 30 minutes; it should be puffy and cold all the way through.
Pick up the top two corners of the dough and press them to the middle; turn the container around and repeat for the other two corners. Deflate the whole mass and fold it in half, still in the container. Cover, refrigerate again and let rise another 20-30 minutes, until it has doubled.
Turn the dough out onto a floured surface.
Roll about 1/2 inch (1.5 cm) thick to cut with doughnut cutters -- 2.5 inch (6 cm) diameter outside, 3/4 inch (2 cm) inside.
Alternatively, divide into 25-30 g pieces and round into seamless balls for filled doughnuts.
As they are cut/shaped, space the doughnuts with enough room to rise on a nonstick mat- or greased paper-lined pan.
They can either rise at room temperature (depending on the dough temperature, it should take 15 -20 minutes), or refrigerated up to two days. For longer storage, freeze immediately (up to 2 weeks) then let rise and defrost at room temp.
Heat 2-3 inches (5-7.5 cm) of oil to 350F (180C) in a wide deep pot. Once the doughnuts are light to the touch, carefully place them 3 or 4 at a time in the pot, turning immediately so the whole surface of each has contact with the oil. This helps to keep the doughnuts round by stopping the surface from drying and causing uneven rising. Push them under the surface of the oil occasionally to cook the insides and prevent a white ring around the middle.
As they turn golden, drain the doughnuts on paper towels and keep them warm in a turned-off oven as you fry the rest.
While they are warm, roll the doughnuts in cinnamon sugar or granulated sugar. To fill them, poke a hole in the worse-looking side with a 1/4 inch (6 mm) plain piping tip while they are warm and the insides are not yet set. Let them cool before filling with jam or pastry cream.
For icing or glazing, let the doughnuts cool completely.
Chocolate doughnut glaze:
300 g confectioner's sugar
50 g unsweetened cocoa
40 g milk
2.5 g salt
200 g semisweet or bittersweet chocolate, melted and warm
Stir all together until smooth. Add boiling water to get a coating texture; if too thin, let cool. Dip doughnuts after filling.
Revel Bars and I go way back. The original was on a recipe card from Toll House i think, and ever since i was 10 or 12 i have been making them; there was a time that pans of these were flying out the door by the dozen as holiday orders. High school and college friends made these one of my signatures, and the aroma of them baking gives me flashbacks to the 80's and 90's. (Scrunchies are back with a vengeance, so there! May we never see the high teased bangs again though.)
This recipe has survived the food-snobbery of side-eyeing anything using canned milk, and has been improved by using good chocolate and a judicious amount of salt. Quick-cooking oats create the best texture; old-fashioned or steel-cut hydrate differently and don't make a satisfying layer.
For this post I decided to go full flashback and make them as I first did, with a hand mixer and countertop toaster/oven. Obviously a "serious" mixer makes quicker, handier work of the oatmeal base, but they taste the same regardless.
Revel Bars -- 1 10x15 pan
1 stick/8 oz/228 g butter or margarine (one case where there's no marked difference), divided into 7 oz (200 g) and 1 oz (28 g)
2 cups/14 oz/400 g brown sugar
2 eggs
2 1/2 cups/11 oz/ 325 g all-purpose flour
3 cups/9 oz/260 g. quick-cooking oats (oatmeal)
1/2 tsp/2.5 g salt
1/2 tsp/2.5 g baking soda
1 14 ounce/400 g can sweetened condensed milk
12 ounces/340 g good-quality bittersweet chocolate
2 tsp vanilla extract
Line a 10x15 rectangular pan with foil or parchment. Preheat the oven to 350F/170C.
For the oatmeal base: Put the 7 oz/200g butter in a mixer bowl. Add the brown sugar to the mixer bowl and cream together until fluffy and light. Beat in the eggs until smooth, then the dry ingredients. Mix on medium speed to a thick batter.
For the fudge: Put the 1 oz/28g butter, condensed milk and chocolate in a microwave-safe bowl or measuring cup. Microwave on full power in 30-second bursts, stirring each time, until just melted. Add the vanilla and stir smooth.
Using your hands and an offset spatula, press 2/3 of the oatmeal base into your prepped pan. Spread the fudge on the oatmeal base, covering it completely. Dot the remaining oatmeal base by the spoonful on top of the fudge layer, spacing evenly.
Bake about 25-30 minutes until the oatmeal part is lightly browned and doesn't hold a dent when you press a fingertip in. Cool on a rack, then carefully lift the slab out of the pan using the parchment or foil onto a cutting board. Cut into 24-30 bars with a serrated knife.
These taste best warm but not hot, an hour or two out of the oven. To get that texture after, microwave a bar approximately 8 seconds on high power.
Half the batch fits in a 9x9 square pan; check after 15 minutes. Cut in 12-16 bars.
Welcome back! For the second half of the tutorial, it's rolling out, cutting, shaping into the actual croissant and filled-rectangle shapes, baking and finishing. You'll need a ruler or tape measure to get the best-looking shapes, and a sharp knife with a blade at least 8 inches long. The batch size we made before yields 24 full-sized pastries -- croissants approximately 6 inches wide, or pains about 5 inches long. Croissants are shaped from a triangle, rolled up from the wide end to the tip, then curved to form the familiar shape -- 4 inches at the base and 8 inches high.
Or you can make them half-size, about 4 inches wide, from a triangle 3 inches by 6 inches. This means 48 pastries, 24 from each half of the dough. The finished dough softens relatively fast when it's rolled thin, and sticking happens. I find it easiest to work with half of the batch at a time because of this, plus it is easier to maneuver a shorter length when rolling. For this reason, the measurements here are for half the batch. To start, flour the counter well and take the finished and rested dough and roll from the open ends (crosswise to the last folds) to make the square into a rectangle about 18 inches long by 9 inches tall -- it will be about 1/2 inch thick. With a sharp knife, cut the dough in half to make 2 9 inch squares. Wrap and refrigerate one half, or put it in a gallon-size freezer bag and freeze it for another time. Your 9 inch square needs to be rolled out to about 3-4 mm thick -- a rectangle approximately 16 inches by 12 inches for full-sized croissants. Don't worry if it is a little too long or wide, but make sure that the 16-inch side is a folded edge (as versus an open end). It will be much easier to get the dough to a 16 inch length than a 12 inch width, but just keep at it, maintaining the even thickness by rolling from the center out. Try not to roll over the edges too much or they'll get too thin. Lift the dough from the counter often to make sure it's not sticking. As it gets thinner, it will start to become elastic and pull back. If it seems too soft, slide the whole thing onto a cutting board or pan and refrigerate the dough about 10-15 minutes. It might shrink -- wait to measure until it's cool. Once you have the right sized rectangle, fold the 16-inch length in half so you have a double thickness rectangle 8 inches tall and 12 inches wide.
Now mark 4 inch segments across the bottom edge. Across the top, mark 2 inches, then 4 inches and another 4 inches -- the last bit will be 2 inches. Mark a diagonal line connecting the bottom right corner with the 2 inch mark at the top. From this mark, make another line to the first 4 inch mark at the bottom for your first triangle. Then go up to the second top point, down to the second bottom point, then up again twice more. You should have 3 triangles pointing up and two whole triangles pointing down, with a half-triangle on each side. Cut with a sharp knife along the marks, then unfold and cut the two middle triangles apart crosswise, as well as the four half-triangles. Press the long (straight) sides of the two half-triangles together for the first croissant, stretching it out long for the maximum layers. Brush off the excess flour -- too much flour on the outside makes for crunchy (not crispy-tender) flakes.
Make two 1/2 inch cuts in the 4-inch base and spread it apart a bit.
Now roll from the 4-inch base, stretching, to the tip. (Make sure the tip stays on the bottom... if it isn't weighted down, it will flip up and might burn, or your croissant might unroll.) Curve the ends into the familiar moon shape.
Repeat for the rest of the triangles, then the other half of the dough. As you shape them, put the croissants on a parchment- or nonstick mat-lined pan, spaced well apart. You can fit 6- 8 full-sized croissants on a 12x18 (half-sheet) pan -- don't crowd them or they will stick together once they rise and bake.
For half-sized croissants, the rectangle should be 12x18 inches, then folded so it is 6 inches tall.
You can fit 12- 15 of this size on a pan.
Once all the croissants are formed, cover them with plastic wrap or another sheet pan and let them rise at room temperature until they double in size and feel very wobbly and light when you touch them -- it will take awhile, about two hours, but let the yeast do its thing.
Alternatively, freeze the shaped but not risen croissants until they are firm, then put them in a freezer bag to rise and bake as you please.
For pains au chocolat, roll the half-batch to a rectangle 12 x18 inches, and cut into 12 rectangles. Brush off the excess flour.
Put a few pieces of chocolate (we like milk chocolate) down the middle and roll up in thirds the long way, placing the end in the bottom center -- if the opening is on the side, it will tip over. Still delicious, but not as even-looking.
For half-sized pains au chocolat, start with the rectangle the same size, 12x18, and cut it into 2 x 4.5 inch rectangles.
As with the croissant, set the formed pains au chocolat on a lined pan, and cover to rise. (Or freeze, as above.) They will tend not to take as long as the croissant, so check them in 1 hr 20 minutes. (I didn't slash mine, but you definitely can, to get those beautiful markings you see on Instagram that show off the layers. Next time, I'll do some with slashes and update this post.) When the shaped croissant and pains are almost fully risen, put a metal pan (like a pie or cake pan) on the floor of the oven (you will use this to create steam later, which will help the pastries rise), set the racks evenly spaced and preheat the oven to 370 degrees. When they are fully risen -- wobbly and light when nudged with a fingertip -- quickly toss about a cup of hot water in the pan on the bottom of the oven and place the pans with the croissants or pains on the racks. Close the door quickly to trap the steam, and bake about 12-15 minutes without peeking. Smells amazing! At the 12-minute point, they should have risen nicely and started to brown -- it's harder to tell with the chocolate dough, but they should feel set and just firm. Rotate the pans top and bottom and front to back, and bake another 5-8 minutes. For half-sized pastries, check and rotate after 8-10 minutes -- they will go quickly! I don't like to egg-wash the chocolate dough because it doesn't really make a nice color. Instead, after baking I brush them with a syrup that makes them shiny as the water evaporates.
100 g sugar
50 g hot water
30 g corn syrup or honey (to prevent crystallization)
When they are fully baked, let the croissant and pains cool a bit before brushing the syrup on, gently so the delicate flakes don't come off. Let them cool completely on a rack so condensation doesn't make the bottoms soggy.
And there you have it! Beautiful, delectable and oh-so-satisfyingly handmade croissants et pains au chocolat, chocolate through and through.
Thank you for sticking it out through this tutorial!! I'm really proud of these, and hope you will be too when you make your own. Let me know what you think!!!
Yes, these are chocolate croissants. Not just pains au chocolat, but croissants, shaped like crescents, made out of yeasted and laminated chocolate dough. As far as Google can find, this is the first English* tutorial on how to make them to ever exist on the interwebs. Like, ever. I'm not sure why.
*EDIT as of 3/8: Pinterest has informed me that tutorials for similar chocolate croissants exist in Chinese and Italian -- I don't know how close they are to these (I can't read either language well enough) but it doesn't look like they are the same from the pictures... just putting out this disclaimer. Shoutout to the international lamination nation. :D
First off, I am indebted to my cousin Angela's Instagram post about chocolate croissants in a random HK mall stall, pleading for anyone to make them in the Philippines, or for a class on croissants. I have taught many a croissant class at ICE and Monroe College (hi, students!!), but she's not in the same city.
Plus, chocolate ones! Here I have to point you to the stunning pix on Francois Brunet's Instagram -- he has the most riveting chocolate pains au chocolat photos (as well as myriad other absolutely stunning bread and pastry work. Seriously it's awe-inspiring.)
But no recipes, let alone tutorials. Sure, there are many that are filled with chocolate, some that have a layer of chocolate dough so they are striped, or even leopard patterned. But none like these.
So on to the figuring!
My formula is based on one in Advanced Bread and Pastry: A Professional Approach by Michel Suas, but adjusted to yield a quantity manageable at home having a stand mixer and a rolling pin but no sheeter, but the dough is easily mixed by hand as well. I use bread flour because of the added cocoa.
I jump at any chance to use my sourdough starter, so it features here too. It tastes wonderful -- the cocoa's bitterness is tempered by the almost leafy tang, and a bit of salt and malt or sugar bump up the lush flavor of both the chocolate and the yeasted dough.
It's a two-part process but can easily by divided into more 30-minute sets -- no need to block off your whole weekend to make croissants! This part is making the dough and putting in the layers, and the second part will be shaping and finishing.
If you don't have an active sourdough or levain (but really if you like to make bread you should!), or if this is the only yeasted recipe you will ever make (no judgement!) you can make an overnight poolish.
220 g. all-purpose flour
220 g room temp water
2.2 g (1/2 tsp) active dry yeast or instant yeast
Whisk together, cover, let rise 10-16 hours.
Chocolate Croissant and Pains au Chocolat
yields 24 full-sized croissant or 12 each croissant and pains au chocolat, or 48 half-size croissant
Detrempe (dough part):
500 g. bread flour
60 g. unsweetened cocoa powder (I used Valrhona)
130 g. water
140 g. milk
7.5 g. (1 1/2 tsp) active dry or instant yeast
440 g. sourdough starter, or the poolish from above
93 g. sugar
15 g. (1 tbsp) salt
2 g. (1/2 tsp) powdered malt, 5 g.malt syrup, or 7 g. more sugar
29 g. butter, softened
With a mixer: Combine flour and cocoa in a mixer bowl. Dissolve the yeast in the water, then add that and the milk and starter or poolish to the cocoa and flour. Mix with the dough hook until no dry bits remain, then 1 minute on low speed. Add the sugar, salt, malt and butter, and mix on medium until the dough comes together and cleans off the bowl.
to mix by hand: Dissolve the yeast in the water. Mix together flour, cocoa, salt, sugar, and malt in a large bowl. Rub in the butter with your fingers until it disappears. Make a well and add the yeast/water, milk, and starter or poolish. Mix with a wooden spoon, then your hands, until the dough comes together and no dry bits remain. Turn the dough out onto the counter and knead a few strokes until it is smooth and uniform.
Cover the dough in the bowl and let it rise at room temperature for 1 hour.
❧❧
Lightly butter or oil a large piece of plastic wrap. Press the dough (it will be a bit puffy but might not have doubled) into a rectangle about 1/2 inch thick on the wrap, fold it over to enclose, and let it rest in the fridge for at least an hour, or up to 6 hours.
❧❧
Buerrage (roll-in butter part):
340 g. unsalted butter, cold
20 g. unsweetened cocoa powder
The goal is to get the butter to the same malleable texture as the detrempe but still very cold -- softened manually, not by temperature. Place the butter (in two or three pieces) on a large piece of plastic wrap, or a nonstick mat. (A piece of heavy vinyl, like from a shower curtain or book cover, works well too.) Scatter the cocoa powder on. Roll the butter so it is coated all over, then fold the plastic on top and start to work the butter and cocoa together by hitting it with a rolling pin.
Use the plastic or mat to fold and shape the butter as you strike. So whack and fold until the cocoa is incorporated, trying to keep the butter pressed together and even. It is a messy process, but pretty satisfying and therapeutic! When all the cocoa is worked in, shape the buerrage into a 10 inch square on the mat, about 1/4 inch thick.
Enclosing (forming the Paton)
Clear off the counter and dust with flour. Unwrap the cold dough and flip it onto the floured surface, trying not to have it fold over on itself. Press the dough out with your hands into a rectangle, 12 inches by 18 inches. (my dough scraper is 6 inches wide - super handy!)
Center the roll-in butter square at the bottom 2/3 of the rectangle, with 1 inch on 3 sides and the rest of the dough at the top.
fold the empty 1/3 of dough onto the buerrage and dust off the excess flour.
Now fold the bottom 1/3 over the middle, making a 3-fold, like a letter to fit an envelope. Press the edges together to seal in the buerrage. You now have 2 layers of butter roll-in between 3 layers of dough.
Press in short up-down strokes with the pin to get the rectangle even and align the layers, then keep pressing until the folded dough is about 1/2 inch thick. I like to do so on the diagonals, so the corners stay true.
When it is thin enough so your knuckles hit the counter, start to roll to a rectangle to make your first laminating fold. My counter doesn't allow me to get around its side, so I turn the dough parallel to the edge so i can leverage to roll the length.
Don't be afraid to flour the surface well -- you don't want the dough to stick and rip to make the butter leak out. Use your scraper to make sure the dough is loose from the counter, moving it around to maintain the even thickness. Aim for a rectangle 3 times as long as it is wide -- in this case, about 9 inches by 27 inches.
Now fold one side over the middle, aligning the edges.
Brush off the excess flour and fold the other side over, making 3 layers.
That was your first fold! You will end up with a 9 inch square. Wrap the croissant dough in plastic wrap and let it rest in the fridge for at least 45 minutes. This gives the butter roll-in a chance to chill and firm up, and the gluten developed to relax -- both make it easier for you to do the 2nd and 3rd folds. (Yeah, you can rest and chill too.)
❦❦
Flour the counter again and place the rested, cold dough square so the folded edges are parallel to the edge of the counter. You want to roll so the open edges become the short sides of the rectangle and the folds become the long edges, so press across with the rolling pin to 1/2 inch thickness, as before.
Roll the dough back out to a 9x27 inch rectangle, then make the 2nd fold just like the first, brushing off any excess flour and aligning the edges. You'll notice that it gets more cohesive and manageable as the butter layers get thinner, but pay attention so you don't have sticking, and it stays an even thickness -- the tendency is for the edges to get thin and the middle to be thicker, so to prevent that, make sure to roll from the middle out, with consistent pressure.
Wrap and rest as before, then repeat one more time, for a total of 3 sets of folds. Yay, the lamination is complete! Wrap the finished dough and let it rest in the fridge at least 2 hours, or up to three days.
This got long enough, so rolling, shaping, baking and finishing will be the next post! Thanks for your patience, see you back here soon for that.
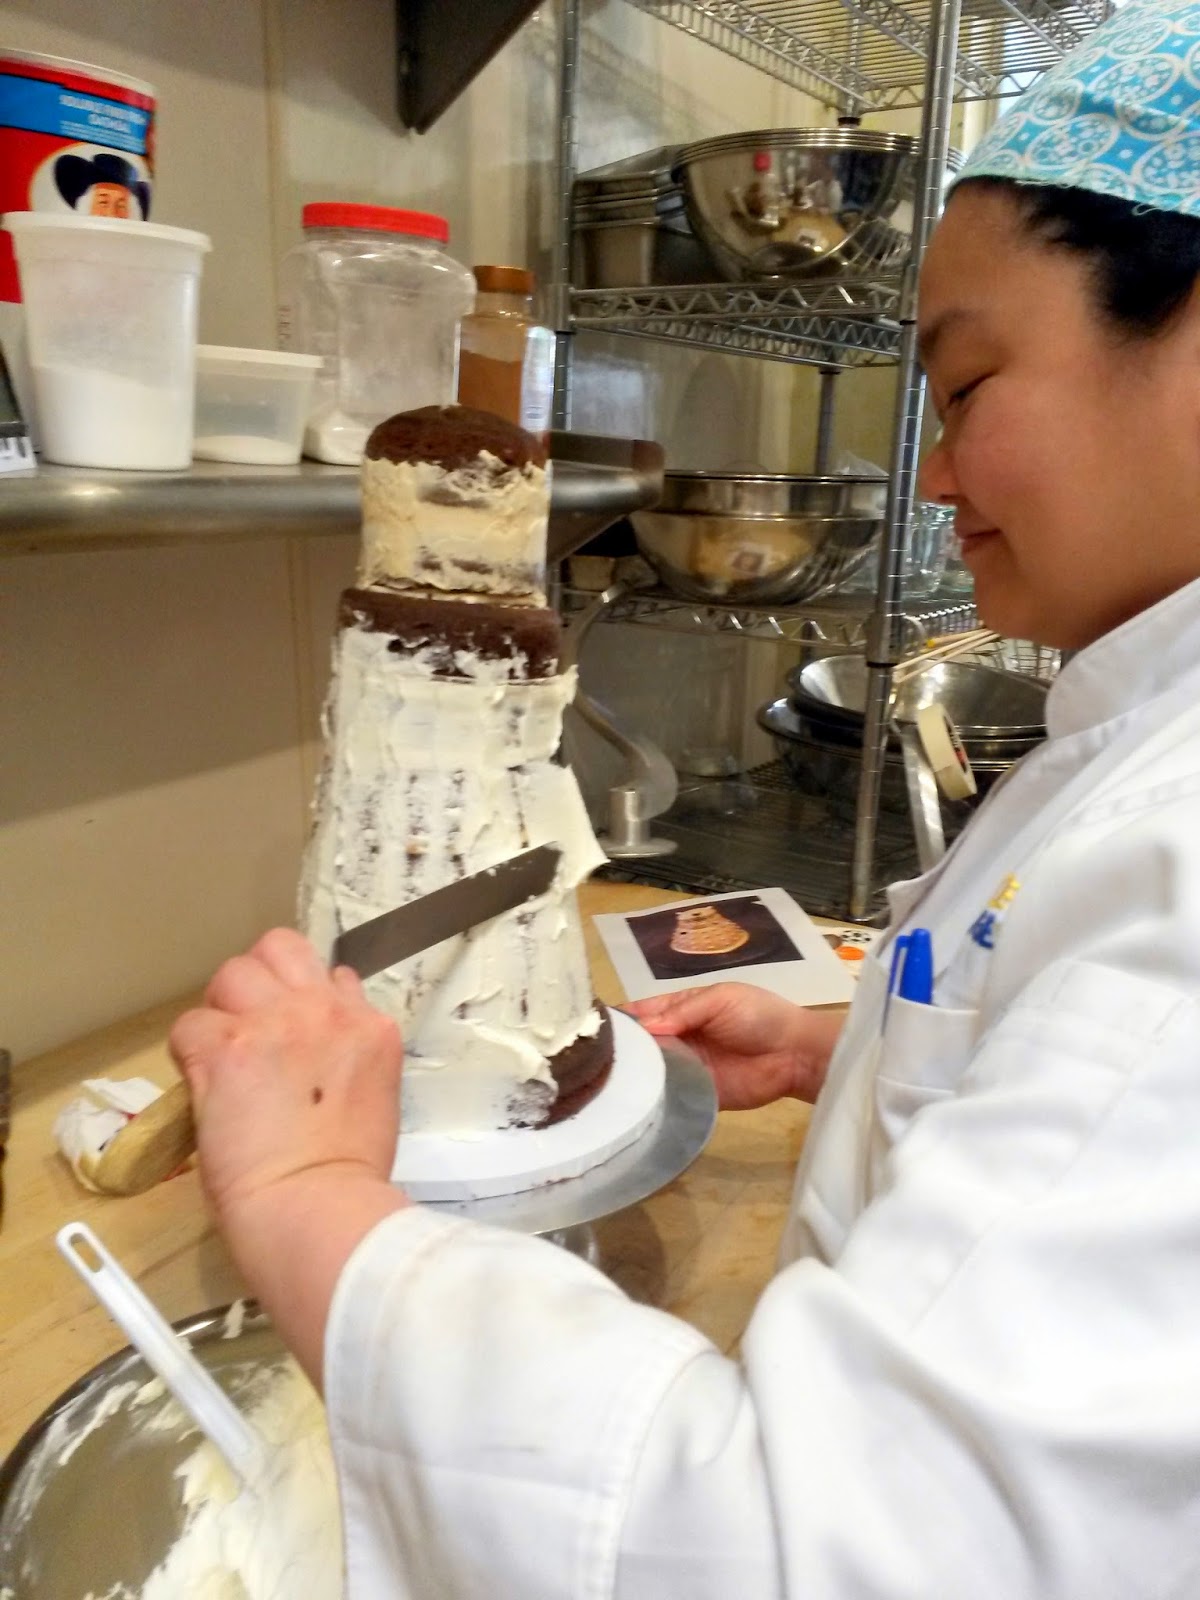
Exterminate!!! No fancy way to beat this Dalek, just eat it. I started out with the idea of making a Dalek cake because -- well, because it's a Dalek and I love Doctor Who! A fellow geek's birthday was the perfect excuse.
First, chocolate cake layers: 2 each 4 inches, 5 inches, 6 inches and 7 inches, and 1 8 inch layer. In retrospect, the 4 inch layers rose so much that I could have gotten away with less in each pan, but the dome provided a good enough base for the round top that I trimmed the corners and was done. The second 4 inch layer was trimmed flat.
For stability and flavor variation, I divided the cakes into sets of three (each set on its own cardboard base) -- with the top three being filled with peanut butter frosting, the middle three with coffee frosting, and the bottom three with chocolate frosting. When stacking, instead of centering, I kept the back edges close (but not quite flush) to maintain a backward slope that was flatter than the forward one.
Four lollipop-stick dowels went into the bottom set, to support the weight of the top two cakes. (if I do this again, maybe three in the middle set as well.) After chilling, I put them all together as a stack and staked the entire thing with a sharpened 3/8 inch wooden dowel to go right through to the drum. I carved the bottom 5 inch, 6 inch and 7 inch cakes into the required slope and tapered the front of the 8 inch to a point.
Manipulator arm, gunstick, and eyestalk on lollipop sticks. I added tylose to the black so the plunger shape would dry unsupported. (The light receptors were on half-sticks for support as well.)
Crumb- coating the whole thing with vanilla frosting, then a sojourn in the freezer. It was hot that Saturday!
I covered the 4 inch top part with a small piece of purple fondant to get the dome perfect, then the majority of the "skirt" with a separate piece, like a cape, overlapping at the 5 inch "shoulder", with the seam running up the back. The gray strips for the base and shoulder were rolled out thicker. The ropes for the neck could have been more angular, now that I look at it objectively.
I made 36 of the "buttons" out of gray fondant and sprayed them silver. In retrospect, chocolate pistoles or candy melts sprayed silver are the perfect size. Not sure how 56 would fit, Tardis Data Core... 14 sections do not look right, even 9 was a pinch. Granted, I put a black control panel in the back to hide the ugly seam. 10 would look good if the back seam was perfect.
Franny wanted to make something for her classmates this Valentine's Day; since they only come in for the morning, they have school breakfast rather than lunch. So we made heart-shaped scones! Including her current favorite baking ingredient, chunks of pink chocolate candy.
A basic scone mixture (this one with butter, flour, baking powder, sugar and eggs, and a bit of milk, aside from the chunks) to pat into circles.
Divide each into quarters. (We should have done fifths, as it turns out there are 14 classmates and not 12! ooops!)
Before separating the sections, slit the curved edge to make a heart shape.
Place well apart on a baking sheet,
then sprinkle with sugar (we like red! it's Valentine's Day for 4 year olds, what do you expect?)
Bake high and fast, so they stay moist.
Yay, ready for school!
Sweetheart Scones
Heat oven to 375 F.
Place in a bowl: 1 cup all-purpose flour, 1 tsp baking powder, 2 tbsp. sugar, 1/4 tsp. salt. Rub in 2 tbsp. cold butter.
Add about 1/3 cup chopped-up pink candy melts.
Beat 1 egg with 3 tbsp. cold milk and stir it in with a fork, just until the dough holds together -- it should be moist and a bit sticky.
Sprinkle flour on the counter and turn the dough out onto it.
With a bench scraper or table knife, divide the scone dough into three portions and shape each into a circle -- about 5 or 6 inches across and as thick as your finger. If it's really sticky, wet your hands to make this easier.
Cut each circle in fourths or fifths to make triangles with a curved edge, then slit the curved edge to make hearts.
Separate them and place on a parchment-lined baking sheet with at least an inch in between.
Sprinkle with sugar, then bake about 12-15 minutes until they smell yummy, are nicely browned on the bottom, and feel firm.